The Goons: Knight, Big Pipe, and Birdeye
The roaming three-man squad: where they spawn, how they fight, what they drop.
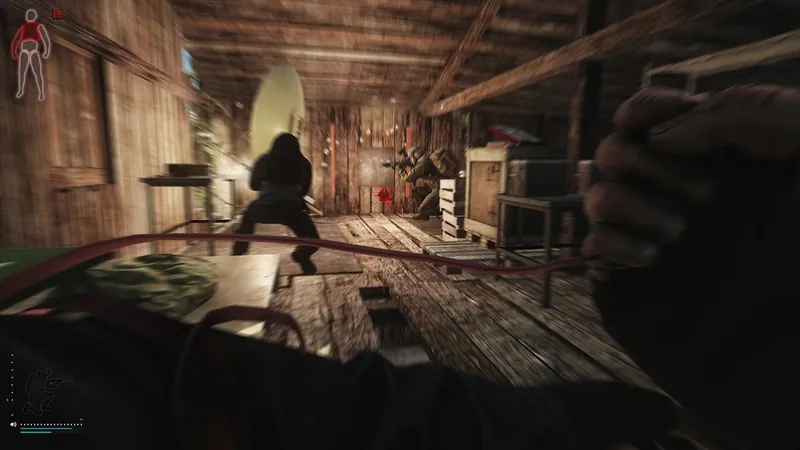
The decision first
The Goons fight as a three-person unit.
- The Goons fight as a three-person unit.
- Knight is the assault lead.
- Birdeye provides sniper overwatch.
- Big Pipe is the grenadier and close-range threat.
- Check known spawn areas across four maps.
- The rotation schedule is unverified in this snapshot.
How to beat the Goons: control the first contact
The Goons are Knight, Big Pipe, and Birdeye: three Rogue bosses whose assault, explosive firepower, and sniper support can turn one exposed peek into a fight from several directions. Your best preparation is a position that lets you engage one target while solid cover blocks the others.
For a deliberate hunt, approach their reported area with a loaded weapon, identify somewhere to receive a push, and choose a second position before revealing yourself. Once contact starts, break the long sightline and fight the enemy who threatens you immediately. Keep count of confirmed kills. Two bodies and a quiet hillside still leave a third boss unaccounted for.
If you are carrying an important quest item or using a kit built for a different objective, avoidance is a sensible win. You do not need to prove that the entire squad is present before changing route. Unexpected accurate fire near a known Goons area is enough reason to get behind terrain, recover stamina, and reassess.
This guide was reviewed on September 17, 2026, using the site's Patch 1.1.5.0 context, developer announcements, and community references. Map approaches and equipment quantities below are practical recommendations. Spawn rates, rotation behavior, and profile-specific quest requirements need current checks; none of the tactics depends on a guaranteed AI delay or an invulnerable hiding spot.
Action checklist
- Choose a primary firing position and a covered fallback before making contact.
- Use a weapon you can handle at both the approach distance and doorway range.
- Shoot the immediate threat instead of chasing a predetermined kill order.
- Account for Knight, Big Pipe, and Birdeye individually before opening a loot screen.
- Leave enough ammunition, medical supplies, and raid time for the extraction.
Recognize the squad and understand its roles
The Goons belong to the Rogue faction, but you should not apply ordinary Lighthouse Rogue assumptions to them. Their original introduction describes hostility toward both PMC factions and Scavs. A USEC character or high Fence reputation is not a safe-passage plan. Their English speech can help alert you to danger, but English voice lines alone do not identify a Goon.
The three roles describe tendencies, not a fixed script. Knight and Big Pipe often supply the close pressure while Birdeye covers a wider angle, but any member you have lost sight of can change position. Recognize distinctive equipment when visibility permits, then base your immediate response on the weapon, distance, and angle you actually face.
The head-health figures below are the community wiki's reference values, not a guarantee that every seasonal modifier or future update uses the same numbers. They explain why a head hit with ammunition designed around ordinary PMC health may fail to end the fight. The individual Knight, Big Pipe, and Birdeye entries are linked in the source ledger.
| Member | Recognition cues | Typical pressure | Wiki head HP |
|---|---|---|---|
| Knight | Death Knight mask; Goons Edition Crye CPC carrier | Assault leader who can close distance aggressively | 80 |
| Big Pipe | Bandana and smoking pipe; Goons Edition PlateFrame carrier | Close assault backed by heavy firepower and possible grenade launchers | 70 |
| Birdeye | Large radio-style backpack; Goons Edition LBT chest rig | Distant overwatch, repositioning, and a possible late push | 70 |
Where the Goons spawn
The regular trio is associated with Customs, Woods, Shoreline, and Lighthouse. These locations tell you where to begin a search, not where each member must remain throughout a raid. A fight, pursuit, or another player's approach can leave a boss away from the landmark you expected to check.
On your first hunts, favor a map you can navigate without stopping in exposed places to consult an extract map. Customs is a useful learning choice if you know its industrial buildings; Woods and Shoreline reward a better understanding of slopes and long sightlines. Lighthouse needs extra care because its September rework changed the surrounding enemy layout.
Knight also has a separate Icebreaker encounter. Do not combine that listing with the four-map squad encounter when deciding whether Big Pipe and Birdeye should be nearby. The Icebreaker section below explains the difference.
| Map | Search area | Approach priority |
|---|---|---|
| Customs | Scav base, also called Stronghold or Fortress, around ZB-013 | Use substantial buildings and walls to limit the angles facing you. |
| Woods | Northwestern antenna and Scav Bunker area | Find a terrain fold or large rock before crossing an exposed approach. |
| Shoreline | Weather station on the southeastern hill | Stay below the skyline and identify a downhill fallback. |
| Lighthouse | Chalet area; older wiki entries also list the northern water treatment plant | Prioritize current sightings and the reworked chalet defenses; older plant routes need rechecking. |
| Icebreaker | Knight on level 0 with two Rogue guards | Prepare for the separate ship encounter, rather than expecting the trio. |
Use trackers as leads, not spawn guarantees
The original Goons description established a roaming squad without a published timetable. Community wiki entries describe a rotation lasting several hours, while TarkovBOT currently displays a warning that matchmaking changes have disrupted the rotation and made the Goons behave like regular boss spawns. Those accounts do not establish one dependable live schedule for every profile and server.
Use a tracker to choose where to investigate. Check whether the report is for PvP, PvE, or Seasonal play, how recently it was submitted, and whether multiple independent sightings support it. A new report from your mode is more useful than an old entry from a different mode, but neither tells you what spawned in your particular raid. Do not copy a live percentage into a long-term farming budget.
For repeated attempts, keep a small log: profile, map, real-world time, area checked, contact or no contact, and outcome. Several empty checks can justify trying another map or taking a break. They do not prove that the next raid is due a spawn. Set a sensible limit on replacement kits so the search does not consume the equipment you need for ordinary progression.
PvE removes hostile human PMCs from the equation, but other AI can still complicate the encounter. It also does not make a PvP tracker a reliable predictor for your session. Apply the same caution to old event videos that show bosses appearing in every raid.
Build a kit for three fights and the walk out
A controllable assault rifle or a semi-automatic rifle with a useful close-range sight is a strong starting point. A bolt-action can punish a distant stationary target, but it gives you less room for error when two enemies reach your cover close together. Choose the weapon whose recoil, reload, sight picture, and ammunition supply you already understand.
As a starting recommendation for a conventional rifle, carry a loaded magazine plus at least three spare magazines and reserve ammunition. Adjust upward for smaller magazines, less effective rounds, or a long route through other enemies. Loose rounds in your secure container cannot replace a ready magazine while a second boss is entering the room. Leave rig space to manage reloads without unnecessary inventory work.
Wear the best serviceable armor you can replace comfortably, but preserve mobility. Expensive protection is useful insurance against some hits; it does not justify standing in a sniper lane or absorbing repeated rifle fire. A headset, clear sight picture, and enough stamina to move between cover contribute directly to your ability to control the encounter.
For a planned hunt, consider two to four grenades, dedicated heavy-bleed treatment, a healing kit, pain relief, a splint, and a surgical kit. These quantities are a starting loadout, not an entry fee. Hotkey emergency treatment before deploying, check remaining uses, and carry food or water if the route and expected waiting time warrant it.
| Priority | What it solves | What to avoid |
|---|---|---|
| Usable ammunition | Armored torsos and elevated boss health | Buying attachments first and loading whatever rounds remain |
| Ready magazines | Back-to-back pushes with little downtime | Beginning the fight with most ammunition still loose |
| Close-range aiming option | A boss suddenly appearing at your corner | Being trapped at high magnification |
| Accessible medical supplies | Bleeding or lost mobility after contact | Searching the backpack during an active push |
| Manageable starting weight | Repositioning now and carrying loot later | Arriving already burdened by optional equipment |
Ammunition and aiming: penetration is only half the decision
A headshot is an excellent opportunity when it is available, but a head hit is not automatically a kill. Damage, impact distance, protection, and the target's health all matter. Maintain your aim for a follow-up until you see the target collapse; do not turn away because the first shot looked good.
For torso shots, select ammunition with credible performance against the armor you expect to encounter. Penetration helps a round reach the body, while damage influences how quickly successful hits finish the target. A high-penetration round with low damage and a high-damage round that struggles against armor create different problems. Compare the specific cartridge, rather than judging it by caliber or price alone, using /tools/ammo-chart and /gear/ammunition.
At a predictable close corner, pre-aim at the height where the target will appear and use controlled follow-up fire. At longer distances, take an identifiable target and a stable sight picture over a hurried shot through foliage. If only an armored chest is visible, either commit ammunition suited to that shot or seek a better angle from cover.
Leg-focused ammunition is a specialized alternative, but it demands sustained access to unarmored limbs. A doorway frame, terrain, or another boss can interrupt that opportunity. For a first dedicated hunt, a versatile rifle loadout offers more options when the fight changes distance than a plan that depends on one body part staying visible.
Knight: prepare for pressure at your corner
Knight's assault role makes him a likely immediate threat once the squad has detected you. His Death Knight mask is a useful recognition cue, but do not wait for a perfect identification while an armed target is closing. Get your weapon ready and keep the approach covered.
Give yourself enough space behind your chosen corner to aim without the weapon being crowded against an obstacle. An interior position that exposes one doorway can be easier to manage than standing outside with the building at your back. Check that a second entrance or window does not offer another member a clean line into the same room.
Avoid stepping out after him if he crosses your view without presenting a clean shot. That pursuit can expose you to his support. Hold or change your angle deliberately, and keep enough rounds available to finish the next engagement. Knight falling is a change in the threat count, not permission to inspect his equipment.
Big Pipe: respect both the rifle and the explosives
Big Pipe's equipment pool includes grenade launchers as well as conventional firearms. The launcher is a possible threat, not a promise that every encounter produces an M32A1 to loot. His bandana and pipe distinguish him visually, while his practical danger comes from having enough firepower to punish a position you cannot leave.
When selecting cover, consider where an explosion could land and whether you have somewhere else to go. A shallow alcove may block direct rifle fire while leaving you trapped. Favor positions with another substantial barrier nearby, and avoid crowding two teammates into the same small corner.
Throw your own grenades from a protected position with an escape route and a clear throw. They can pressure a known location or create a chance to move, but a grenade does not guarantee a voice line, a predictable run, or a kill. Drawing a grenade while Big Pipe is already rounding your corner leaves you without the weapon you need most.
Birdeye: finish the search without exposing yourself
Birdeye often supports the other two from farther away and may reposition or approach after they die. The current wiki describes his footsteps as reduced in volume. Treat audio as incomplete information: a quiet approach can still contain a moving target, and silence after two kills does not establish that the third boss has left.
After the close fight, check your magazine and cover the next likely entry before doing anything lengthy. If you know the direction of his last shot, identify the terrain or structure that blocks that angle. Move behind that barrier rather than walking directly toward the sound. Keep possible approaches in view even while listening for new clues.
If he stays out of sight, use a deliberate search: observe one sector, move to the next protected position, and reassess. A grenade toward a credible hiding place can provide information if he reacts; no reaction proves nothing. Avoid repeatedly exposing the same window just to provoke him.
You do not have to complete that search if medical supplies, ammunition, or the clock are running out. Leaving two bodies untouched can preserve a successful raid. If you continue, maintain a specific question at each position: which angle am I checking, and what cover will protect me if he fires?
Run the engagement in four deliberate stages
First, prepare contact. Choose a solid barrier, identify the route back to it, and inspect the approaches you cannot watch simultaneously. If the only available firing position puts you on a skyline or leaves a broad open retreat, keep moving until you find a better place. Take the opening shot only when it supports a fight you are equipped to finish.
Second, break the squad's shared sightlines. Once you have drawn fire, withdraw behind your selected cover and receive the closest threat. Do not alternate between several distant shooters from the same exposed position. The purpose of the retreat is to reduce the number of enemies who can shoot you at once, not to trigger a particular animation.
Third, reassess after every confirmed kill. Keep your weapon on the approach, then use a genuinely protected pause to reload or stop a bleed. If a second angle opens, abandon the original position before it becomes a trap. Count a visible collapse or confirmed objective update, rather than assuming that a target disappearing behind an obstacle means it died.
Fourth, clear the remaining threat and prepare to leave. A common encounter ends with a search for Birdeye, but take a safe shot at him first if he presents one. There is no universal Knight-then-Big-Pipe-then-Birdeye requirement. The best target is the one you can remove without handing the rest of the squad an uncontested shot.
Customs: work around Stronghold and the medical building
On Customs, begin with the Scav base around ZB-013, commonly called Stronghold or Fortress. Nearby buildings offer ways to break sightlines, which is why this is a reasonable map for learning the encounter. The danger is crossing the open ground between those buildings after the squad already knows where you are.
The medical building known as Crackhouse is a common staging option if you can reach and clear it safely. Before making contact, identify an interior fallback and check its doors, stairs, and windows. You want a position from which you can watch an approach without standing in a window visible from Stronghold. Do not sprint across to the building after detection simply because a video used it.
If a target is visible from protected observation, take the shot and move off that sightline. Receive a push from inside substantial cover, keeping your muzzle clear of the wall and another exit in mind. Closing a door can restrict visibility and give you a recognizable entry point, but doors and thin surfaces are not guaranteed protection. Never base the attempt on an assumed pause in enemy behavior.
If the squad stays near Stronghold, avoid crossing its courtyard just to force the expected rush. Reposition around cover, examine a different approach, or leave. After the encounter, check your assigned exits and their conditions; being beside ZB-013 does not mean that extraction is ready for your PMC. Use /maps/customs to plan the return route before you begin collecting heavy loot.
Woods: use terrain around the northwest antenna
The Woods search area is the northwestern antenna and Scav Bunker, not Shturman's sawmill. Confirm the landmark on /maps/woods before committing to a long crossing. Confusing the nearby wooded points of interest can leave you looking in the wrong direction while approaching the actual threat.
Large rocks and changes in elevation are more useful than foliage alone. A bush can make it harder for you to see without providing reliable protection from incoming rounds. Before cresting a rise, find a route back down that breaks the sightline completely. Avoid arriving at the crest exhausted after a long sprint.
When contact starts, move behind the terrain you selected and watch the routes around it. One rock is not automatically enough if enemies can reach both sides. If a shot arrives from a new direction, shift to another barrier while you still have a covered route; circling the same rock indefinitely can surrender the initiative.
The bunker can limit visible approaches, but entering it is a commitment. Consider your ability to leave, the grenade threat, and whether anything already occupies it. Once the immediate attackers are down, search for the remaining member through short moves between solid positions. Walking upright across the clearing to inspect a body is exactly the exposure an overwatch shooter needs.
Shoreline: fight from below the weather-station crest
Shoreline's regular Goons location is the weather station on the southeastern hill. The height makes the final approach the critical part of the hunt. A route that is convenient for visiting the station during an ordinary task can put your full silhouette against the sky when a boss is watching.
Approach through terrain that keeps a fold or substantial rock between you and the hilltop. Before looking over the crest, choose where you will fall back and which route an approaching enemy would have to use. If incoming fire establishes contact first, drop below the sightline promptly rather than stopping on the slope to identify the shooter.
From below the crest, a pushing target may become easier to isolate from the rest of the squad. Keep enough distance from your cover to aim comfortably, but do not expose yourself to the station merely to watch a wider area. Avoid repeated head-only peeks at the same tree or lip of terrain; they give you little room to recover if the enemy already has the angle.
After the close engagement, work around the hill using cover and check the station from a different position. Do not walk straight over the crest to celebrate two kills. Birdeye, another hostile AI, or a human player in PvP can still cover the approach. Keep your onward route from /maps/shoreline in mind so the hunt does not consume the time needed to reach an assigned extract.
Lighthouse: account for the September rework
Older wiki entries place the Goons at the blue chalet and northern water treatment plant. The September 8 developer announcement confirms that ordinary Rogues moved to the mountain chalets and that the plant's stationary weapons and landmines were removed. It does not publish a complete revised Goons spawn table. A current TarkovHead listing identifies Chalet for Knight, so prioritize recent chalet sightings without treating the old plant listing as a verified current route.
The tactical consequence is that a chalet approach can involve more than the three bosses you came to hunt. Identify targets before counting them toward the squad, and do not assume that killing an armed Rogue means you have removed Knight or Big Pipe. Ordinary defenders can consume ammunition, expose your position, and open a second angle during the boss fight.
Use /maps/lighthouse for route planning, checking its landmarks against the terrain you actually see in the raid. Reach solid cover before trying to observe the chalet, and inspect a building's alternative entrances before using it as a fighting position. Treat old sauna-room or doorway demonstrations as examples of controlling an approach, not proof that the same pathing still works.
If your only information is an old water-treatment farming video, choose a better-understood map for the next dedicated attempt. Lighthouse remains an option, but learning a changed route and learning the Goons encounter at the same time increases the number of decisions you must solve under fire.
Solo and squad tactics require different discipline
Solo players should favor positions with few visible approaches and a short protected move between them. You have no second weapon watching while you reload, heal, or throw a grenade. Use those actions only when distance, solid cover, or a confirmed change in the fight gives you enough room; a short lull by itself is a weak reason to begin surgery.
In a duo, assign one player to the main approach and one to the flank or longer angle. Both players should know the fallback location before the first shot. Keep enough separation that one grenade or burst cannot catch both, while remaining close enough to support a teammate under pressure.
Use short calls that describe an observable fact: target at the outer door, one body beside the stairs, reloading, moving behind you. Avoid announcing that Birdeye is dead because an unidentified figure fell. A mistaken call can send the other player into an active sightline or start a loot search too soon.
Agree on quest priorities before deploying, then confirm actual objective progress after the fight. Do not assume that a teammate's kill satisfied your task; group-credit rules and task eligibility need checking on the active profile. Even where helping is possible, deliberately refusing an urgent defensive shot to preserve someone's preferred kill can lose the entire squad.
Stray Dogs: organize the hunt around the active task
Stray Dogs is Jaeger's task targeting Knight, Big Pipe, and Birdeye. The reviewed wiki describes three elimination objectives, with no Goons equipment hand-in attached to those objectives. Accept the task on the PMC profile you intend to use before starting a dedicated hunt, and check which names remain incomplete after each attempt.
Online quest databases currently disagree about unlock level, trader requirements, rewards, Kappa relevance, and even whether a one-raid condition is displayed. The older wiki listing gives level 35 and Huntsman Path prerequisites, while newer databases show different progression requirements. Your character's task screen is the deciding reference. In particular, check for any one-raid or survival condition before planning to split the kills across attempts.
If your active version shows independent counters without an additional completion condition, use the surviving progress to guide subsequent hunts. If it demands all targets in one raid, arrive equipped for the full trio and do not treat partial kills as completion. Keep a record of what the task actually credited rather than relying on the number of boss bodies your group found.
A missing task and an absent boss are different problems. If Stray Dogs is unavailable, review Jaeger's requirements and your progression first; more raids at Stronghold will not unlock a task by themselves. For broader planning, see /guides/huntsman-path-guide and /guides/trader-loyalty-guide, but confirm their general route against the requirements on your current character.
Action checklist
- Confirm Stray Dogs is accepted on the correct PMC profile.
- Read all conditions, including any one-raid, survival, or equipment wording.
- Record which of the three objectives are still outstanding.
- Check actual task credit after combat rather than assuming shared squad progress.
- Turn in the completed task before selling gear needed by any separate active objective.
Knight on Icebreaker is a separate encounter
The Icebreaker map reference lists Knight on level 0 with two Rogue guards. That is a different escort from Big Pipe and Birdeye. Finding Knight aboard the ship therefore does not establish that the regular trio is present, and it is not a route for obtaining all three Goons kills in that encounter.
The September 8 developer announcement also changed Icebreaker entry: access is available from Shoreline or Lighthouse and uses a single-use marine repair kit instead of the old rouble payment. Before pursuing this option, review /maps/icebreaker for the ship's access and extraction requirements and carry the supplies needed for the whole route.
For a player whose active task still needs only Knight, the ship encounter is worth investigating if the current objective accepts that location. For someone learning the full squad, it teaches a different fight and adds access costs and ship navigation. Decide which objective you are solving before spending an entry item or committing to the transit.
Loot the encounter in order of survival value
Before opening a body, reload, stop dangerous bleeding, and confirm the surrounding angles. In a squad, one player should watch while the other searches. Solo, take a short first pass and return to cover if visibility is poor. A long inventory screen makes it easy to miss a new arrival or a surviving boss.
Prioritize anything required by an active task, then useful ammunition, compact valuables, and equipment you actually intend to extract with. Knight's mask and CPC, Big Pipe's bandana, pipe and PlateFrame, and Birdeye's backpack and LBT rig are recognizable trophies. Their value depends on condition, your needs, and current selling options; distinctive gear is not automatically the best item per slot.
Inspect plates and durability before replacing working protection with a carrier recovered from a firefight. Check the ammunition in a looted weapon instead of assuming that an expensive-looking build is loaded with the rounds you want. If you take a launcher, verify its contents and available ammunition rather than counting its name alone as a successful profit run.
Recalculate your exit plan after the first substantial pickup. Extra weight, a damaged leg, or dwindling hydration can change which route is practical. Leave bulky gear behind if carrying it makes every open crossing slower. Once you have the task result or loot you came for, more searching should earn its place against the time and exposure it costs.
Disengage when the position stops working
A second firing angle, an empty weapon with no safe reload, lost mobility, or a collapsing raid timer can all justify ending the hunt. Decide early enough that you still have a route out. Waiting until every resource is exhausted turns a tactical withdrawal into an exposed sprint.
Break direct sight with a substantial building, rock formation, or terrain fold, then move to another protected position. A short step behind a bush does not establish safety. Continue watching for pursuit and avoid returning immediately to the same edge from which you were just engaged. Use pain relief or emergency treatment only when your position gives you room to perform the action.
Once you have breathing room, check health, ammunition, stamina, hydration, and the actual extraction list. Choose whether the next move is another defensive position or a complete withdrawal. Do not spend the last workable minutes circling the fight because one expensive weapon is lying in the open.
For an unexpected encounter during a task run, success may simply mean preserving your carried objective. Route around the area after breaking contact and accept the extra walking. That choice also gives you a concrete lesson for the next raid: where the first contact occurred and which nearby cover actually helped you survive it.
Fix the mistake that ended the last attempt
Review the first decision that made the fight difficult, not just the final bullet. If the opening sightline exposed you to two shooters, buying a more expensive helmet will not correct the approach. If you survived the push but died while reloading, improve magazine readiness and the timing of your actions.
Change one part of the next attempt so the result teaches you something. Keep a familiar weapon, try a better fallback, and note whether you could isolate the first target. A repeatable setup makes it easier to distinguish a tactical improvement from a raid in which the squad simply behaved differently.
Action checklist
- Before entry: accepted task, useful ammunition, full magazines, medical hotkeys, extraction plan.
- Before contact: primary cover, fallback cover, a watched approach, enough stamina to move.
- After each kill: remaining names, new angles, magazine state, urgent injuries.
- Before looting: threats accounted for, route available, enough time to carry the haul out.
| What went wrong | Likely planning problem | Next adjustment |
|---|---|---|
| Killed immediately on the approach | You reached the sightline before choosing cover | Identify the retreat position before cresting or crossing. |
| Two bosses fired at once | The position exposed several sectors | Use a deeper corner or a terrain barrier that blocks one angle. |
| The second attacker caught a reload | Too few ready rounds or poor reload timing | Start with full magazines and reload behind solid separation. |
| Died after two confirmed kills | The remaining member was treated as absent | Keep an explicit count and finish the area check before looting. |
| Tracker-led raids stayed empty | A sighting was treated as a schedule | Check mode and report age, then set a limit on repeat searches. |
| Won the fight but missed extraction | Looting consumed the remaining resources | Set a departure time and collect only the highest-priority items. |
Avoid these mistakes
- Treating one visible Goon as an isolated target.
- Repeating unverified reaction-time claims.
- Expecting a guaranteed rotating spawn schedule.
Source ledger
- Battlestate Games - Patch 1.1.5.0 announcementOfficial
Developer publication for the September 8 Lighthouse and Icebreaker changes. Its relevant text was checked through the publisher's Steam announcement listed next because direct retrieval of this page was unavailable.
- Escape from Tarkov on Steam - official announcementsReference
Publisher-posted Patch 1.1.5.0 text confirms Rogue relocation to mountain chalets, removal of plant stationary weapons and landmines, and revised Icebreaker access. It does not establish a complete revised Goons spawn table.
- Knight - Escape from Tarkov WikiReference
Community reference for squad leadership, 80 head HP, named-boss Scav-karma treatment, regular hunting maps, and the separate Icebreaker escort. Indexed text reviewed September 17; it is not a live server-state feed.
- Big Pipe - Escape from Tarkov WikiReference
Community reference for assault behavior, 70 head HP, launcher and firearm equipment alternatives, distinctive gear, and named-boss Scav-karma treatment.
- Birdeye - Escape from Tarkov WikiReference
Community reference for overwatch and possible late pursuit, 70 head HP, and reduced-volume footsteps. Supports cautious audio wording rather than a claim of completely silent movement.
- Customs - Escape from Tarkov WikiReference
Places the trio at the Scav base around ZB-013 and records their notable equipment. The article's positioning and withdrawal recommendations are tactical interpretation.
- Woods - Escape from Tarkov WikiReference
Identifies the northwestern antenna and Scav Bunker area for the Goons, separate from Shturman's sawmill location.
- Shoreline - Escape from Tarkov WikiReference
Locates the regular squad at the weather station on the southeastern hill. The approach plan applies cover and sightline management to that location.
- Lighthouse - Escape from Tarkov WikiReference
Records the older blue-chalet and water-treatment spawn listings. These are explicitly separated from the September rework and are not presented as a newly verified complete spawn table.
- Knight - TarkovHead boss referenceReference
Current community listing identifies Chalet for Knight on Lighthouse. Used as a search lead alongside developer patch notes, without adopting its percentages as guaranteed live values.
- TarkovBOT - Goons trackerReference
Separates PvP, PvE, and Seasonal sighting reports and displays a matchmaking-related rotation warning. This is community reporting, not confirmation of any individual raid's spawn.
- Stray Dogs - Escape from Tarkov WikiReference
Lists Jaeger's three elimination objectives and the older level-35 unlock information. Progression details are compared with newer conflicting databases rather than asserted as universal current requirements.
- Stray Dogs - Mr. Souer quest databaseReference
Shows trader-loyalty requirements and rewards that differ from the older wiki listing, demonstrating why the active character's task screen must determine progression planning.
- Stray Dogs - Tarkov101 quest entryReference
Displays a one-raid qualifier and unlock information that conflict with other reviewed references. Used to identify the disagreement, not to resolve it without in-game evidence.
- Icebreaker - Escape from Tarkov WikiReference
Lists Knight on level 0 with two Rogue guards, supporting the distinction between the ship encounter and the regular three-boss squad.
- Changelog - Escape from Tarkov WikiReference
Archived June 29, 2022 introduction documents the three combat roles, shared enemy information, hostility toward both PMC factions and Scavs, and roaming without a published timetable. Historical design is distinguished from current tracker observations.
Frequently asked questions
Who are the Goons in Escape from Tarkov?
Knight, Big Pipe, and Birdeye are a three-member Rogue boss squad. Knight leads the assault, Big Pipe adds heavy firepower, and Birdeye typically provides overwatch. Treat them as a coordinated encounter even when only one member is visible.
Where should I look for the Goons?
Check Stronghold around ZB-013 on Customs, the northwest antenna and Scav Bunker on Woods, and the weather station on Shoreline. Lighthouse's chalet area is also relevant, but its September 2026 rework means older water-treatment routes need checking. Knight's Icebreaker appearance is a separate encounter with Rogue guards.
Is there a guaranteed Goons rotation or spawn percentage?
No reliable universal schedule is established by the reviewed sources. Historical rotation descriptions conflict with current tracker warnings about matchmaking changes. Use recent reports from your own mode to choose a search area; they do not confirm a spawn in your raid.
Which Goon should I kill first?
Kill the immediate threat you can engage from cover. Knight or Big Pipe may reach you first, but take an exposed Birdeye if the shot is safe. Moving into several firing angles to follow a rigid kill order is usually a worse trade than removing the available target.
Does Birdeye have completely silent footsteps?
The reviewed wiki says his footsteps have reduced volume. Plan around unreliable audio detection rather than assuming either normal footsteps or absolute silence. Keep watching possible approaches after the other two members fall.
Will one headshot kill a Goon?
Not necessarily. The wiki lists 80 head HP for Knight and 70 for Big Pipe and Birdeye, above ordinary PMC head health. Ammunition damage, range, protection, and any active modifiers affect the result. Be ready to follow up until the kill is confirmed.
Are the Goons friendly to USEC or high-karma Scavs?
Do not expect either to protect you. The squad's documented behavior is hostile to both PMC factions and Scavs. The individual wiki pages report no Scav-karma penalty for killing the named Goons, but that does not make other nearby AI safe to shoot indiscriminately.
Must Stray Dogs be completed in one raid?
Read the condition on your active task. The reviewed wiki lists three elimination objectives without a one-raid qualifier, while other current databases display conflicting requirements. If your task specifies one raid or survival, satisfy that condition; otherwise use the progress shown by its individual counters.
Can Icebreaker provide all three Stray Dogs kills?
The documented Icebreaker encounter contains Knight with two Rogue guards, not Big Pipe and Birdeye. Consider it only for a Knight objective that accepts the location, and prepare for the ship's separate access and extraction requirements.
What should I do if I only need Birdeye?
Prepare for the entire squad anyway. Survive any close push, keep his possible approaches covered, and search from one protected position to another after the immediate threats are down. Do not rush the bodies or expose yourself repeatedly just to make him react.
Is night hunting automatically easier?
Choose lighting in which you can identify targets and navigate confidently. Darkness is not a guarantee that the Goons cannot detect you, and equipment that improves your vision does not remove crossfire or grenade threats. The same cover and fallback plan remains necessary.
Does Big Pipe always drop a grenade launcher?
His documented equipment pool includes grenade launchers and other firearms. Treat the launcher as possible equipment, not guaranteed loot or guaranteed profit, and inspect what actually spawned after the encounter is secure.