Escape from Tarkov Beginner's Guide: Your First Hours in 1.0
New-player orientation: what kind of game this is, what a raid is, and what to do first.
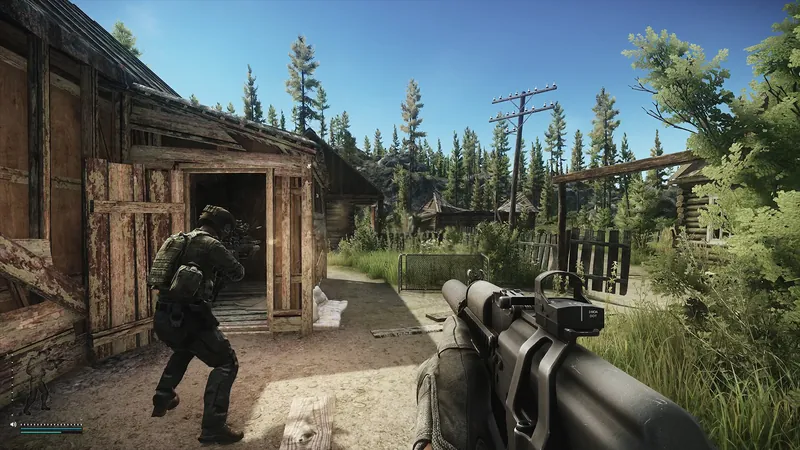
The decision first
Start with one survival objective.
- Start with one survival objective.
- Choose your profile before spending equipment.
- Practice navigation on Ground Zero.
- Learn an available extraction before looting.
- Use Tour to unlock traders and maps.
- Keep replacement equipment for the next attempt.
Decide what a successful first raid means
Escape from Tarkov is an extraction shooter with persistent equipment, quests, a stash, and a hideout. You enter a timed location, decide what to accomplish, and leave through an extraction point. A successful beginning is therefore more specific than winning a gunfight: identify your starting area, complete one useful action, and reach a valid exit. Loot only becomes useful when it reaches the profile that needs it. Chasing a distant gunshot can undo the quest progress and supplies already sitting in your backpack.
Set one primary objective before choosing equipment. For your first sessions, use objectives such as finding the Nakatani building, recognizing an extraction approach, or bringing back a required medical item. Add an optional objective only if it lies along the same route. This is editorial planning advice, not a hidden reward mechanic. It keeps the number of decisions manageable while you learn the map. If you arrive at a dangerous building with a valuable quest item already secured, leaving is a reasonable success.
This guide follows the supplied September 8 research baseline, verified against Patch 1.1.5.0 (September 2026) within that research. Values described as unverified remain uncertain. Treat your current quest screen, extraction list, and item descriptions as operational checks before entering a raid; a static guide cannot see your particular character's unlocks or the conditions of a specific match.
Choose a profile before building habits
The research distinguishes PMC raids, Scav raids, PvE, Practice, and Arena. These names describe different ways to play rather than five interchangeable copies of the same progression. PMC raids use the character and equipment you prepare. Scav runs provide a scavenger loadout and support a different risk calculation. Practice offers a place to rehearse controls and routes. Arena is the separate competitive experience; it should not be treated as a substitute for learning extraction conditions on the main game's maps.
PvE Zone has its own permanent character profile and matchmaking arrangement, separate from permanent PvP. Choose it if learning against AI fits your goals, while remembering that AI bosses and elite enemies still demand preparation. PvP Zone includes player opposition and maintains its own permanent progression. Seasonal characters are another separate PvP profile with a fresh economy and hideout; their seasonal resets do not erase your permanent PvP or PvE profiles. Confirm the active profile whenever you return to the character selection screen.
For an initial learning plan, select the mode you actually want to progress and remain there long enough to understand its stash, tasks, and economy. Switching profiles can be enjoyable, but it divides your equipment and quest progress. Do not assume an item found on one profile is available for a hand-in on another. Also check your edition's PvE entitlement in the official purchase interface instead of relying on historical bundle prices.
Understand the current progression reset rules
Older Tarkov advice often assumes everyone loses their account progression at the next major update. The supplied version research records the last full reset at the November 15, 2025 launch of version 1.0, with permanent PvP and PvE progress retained afterward. The seasonal system introduced by patch 1.1.0.0 supplies a separate fresh-start experience. Official season notes describe a reset cadence of four to six months for seasonal characters, alongside an intended two seasons each year.
This distinction changes the meaning of a beginner's investment. Learning a route, upgrading a permanent hideout, and progressing ordinary traders can be part of a long-term profile. Seasonal investment instead belongs to a bounded progression cycle. Neither choice makes a failed raid irreversible account failure: the practical question is whether you can replace the lost equipment and continue the task you chose. Keep enough supplies for another attempt rather than spending everything to imitate an advanced loadout.
Season 1 is called KORD BREACH in the research baseline. Its battle-pass progress is shared across the three main profile modes, but the seasonal character itself remains separate. Personal seasonal modifiers lock for that season after character creation. Read those effects before committing; a permanent limitation affecting stamina or noise may be a poor fit while you are still learning movement and sound. Exact community-reported end dates should be checked in the game.
Prepare controls and an affordable first kit
Before queueing, locate the controls for your inventory, weapon inspection, reloading, healing, interaction, and the extraction list. Rehearse them in the game's available practice setting. The purpose is not to memorize every advanced binding immediately. It is to avoid discovering, while injured in an exposed street, that you do not know where a medicine is stored or how to inspect your remaining route options. Write down the few actions you regularly forget and work through them deliberately.
Build a kit around an obtainable cartridge and a weapon that accepts it. Inspect the magazine, ammunition caliber, and weapon configuration together. A magazine that looks appropriate can still leave you with an unusable combination. Bring healing supplies you understand, space for useful loot, and any specific item required by your intended extraction. A vehicle route needs money; a flare route needs the correct flare; a locked exit needs its corresponding key. An alternate exit should remain possible if the first choice fails.
Affordability is a personal replacement test, not a fixed rouble total in this guide. Ask whether losing the kit would prevent your next two learning attempts. If it would, remove optional attachments or use a simpler platform before sacrificing necessary ammunition or medical supplies. The research does not verify current market prices, so screenshots of old budget builds should not dictate what you can afford in September 2026.
Start by learning Ground Zero landmarks
Ground Zero separates characters below level 21 from those at level 21 and above. The research lists nine to ten players for the lower-level pool and nine to twelve for the higher-level pool, with a thirty-minute raid. That separation makes it the designed starting location, but it is not a promise of a safe or empty match. Other new characters can still be controlled by experienced players. Think of the bracket as progression grouping rather than a skill guarantee.
Learn the relationship between the TerraGroup headquarters, Nakatani building, Tartowers, and the underground parking areas. A landmark-based route is easier to recover than a long string of left and right turns. When you move indoors, remember which side of the building you entered and what outdoor reference you expect to see on leaving. If you become disoriented, pause somewhere defensible, identify a known structure, and shorten your objective instead of sprinting across unfamiliar terrain.
The higher-level pool has a different threat context, including possible Cultists and rarer loot according to the map research. Do not assume a route remains equivalent after crossing the level boundary. For now, prioritize two recognizable exits and one quest approach. Repeating a small route until it becomes familiar usually teaches more than visiting every named building once without understanding how to return from any of them.
Learn two exits before adding a third
Ground Zero's ordinary extraction references include Emercom Checkpoint and Nakatani Basement Stairs. Their approaches are useful first routes to rehearse because the map notes do not attach payment, a flare, or a code-word item to them. Confirm which exits the raid presents to your character, then navigate toward the matching location. Reaching a familiar building is only part of extraction; you still need the correct active zone and enough time to complete the process.
Several alternatives have additional conditions. Mira Ave requires a green flare fired from the signal area. Police Cordon is a paid vehicle extraction, listed at a baseline of 5,000 roubles per person with four seats; reputation can affect vehicle pricing. Scav Checkpoint is cooperative and needs a PMC and a Scav together. Tartowers Sales Office requires the note bearing the code word Adaptation. These are distinct mechanisms, so possession of any random note or any flare color does not satisfy them.
Choose your alternate before the primary becomes unavailable. A vehicle can leave, a stranger may refuse cooperation, and a required item may be missing. When planning a first route, identify where you would turn toward the backup. This changes a failed extraction attempt from a last-minute emergency into an expected branch of your route. Leave additional travel time when you are injured or carrying a heavy load.
Follow Tour through the initial unlocks
Tour is the guided story chapter that opens much of the trader and map network in the supplied research. Its first step is extracting from Ground Zero. The next recorded step sends you to Therapist and requires 250,000 roubles, opening Streets of Tarkov. Read the active chapter dialogue carefully instead of assuming every trader and map is immediately selectable. A locked destination can be an unfinished story requirement rather than a menu problem.
Ragman's Interchange stage asks for a surviving extraction or three visits and opens Skier together with Customs. At the Customs stage, the research specifies surviving the map and providing five found-in-raid building materials or tools; the reward is access to Mechanic and Factory. The Factory stage then asks for survival and two found-in-raid weapons, opening Prapor and Woods. These material requirements are a reason to examine common loot before selling it automatically after a raid.
The sequence is a progression route, not an instruction to carry every future hand-in item through every map. Store appropriate items safely between attempts and check their eligibility in the quest interface. If you have already collected a required weapon or tool, taking it into another raid can remove its found-in-raid status. Complete the immediate unlock, read the next requirement, and prepare a fresh route around the newly available location.
Plan the later Tour gates without rushing them
The Woods portion of Tour requires three kills and an extraction in the research, unlocking Peacekeeper and Shoreline. A later step uses the radio near Shoreline's southeastern watchtower for the Terminal conversation. The notes specifically caution against attacking the guards or repeatedly pressing the radio. Follow the active dialogue instead of treating neutral characters around a story interaction as ordinary loot targets. An unnecessary fight can disrupt the objective you traveled there to complete.
The subsequent progression asks for a Shoreline surviving extraction and five PMC dogtags before Reserve, followed by a 20,000-dollar payment associated with Lighthouse. The research says those dollars can be purchased from Peacekeeper. Treat this as a future savings goal rather than an expense your first few raids must immediately cover. Preserve useful quest items, sell what you do not need, and revisit the payment once your basic equipment supply is stable.
Tour's final recorded stage uses a TerraGroup Labs access keycard to reach The Lab through Streets or Factory, then checks the manager's office, server area, and drainage escape location. It opens The Lab and awards Pathfinder. The Lab has separate hazards, including Raiders, extraction mechanisms, and no insurance return. Reaching that chapter step does not make an unfamiliar Labs run economical; learn its route before committing the entry card and equipment.
Protect found-in-raid items from avoidable mistakes
Found in raid, usually shortened to FIR, is an item status used by many hand-in objectives. The trader research lists three qualifying origins: loot brought out with a Survived result, hideout-crafted items, and quest rewards. Buying a similar-looking item does not automatically satisfy a task asking for FIR. The distinction concerns the item's history, not whether the object has the right name or whether you spent a large amount acquiring it.
For ordinary raid loot, the research lists KIA, MIA, Left the Action, and Run Through as results that do not grant the required status. It gives two ways to avoid Run Through: earning at least 200 experience in the raid or remaining for at least seven minutes. Do not turn those thresholds into a reason to wait exposed beside an exit. Choose a defensible route, perform useful actions along it, and account for the elapsed time before leaving.
An item carried into a raid loses its FIR status, so move newly recovered hand-in supplies into the stash or submit them before your next deployment. Dedicated quest objects use a separate task inventory and have their own handling rules. Some only appear when the corresponding task is active, and failed extraction can lose them. Read the objective rather than applying ordinary item rules indiscriminately to every document or quest object you encounter.
Use Scav runs to recover equipment and observe routes
A Scav run starts with a scavenger loadout rather than the PMC kit you bought and assembled. That makes it a useful way to acquire supplies without exposing the current stash loadout. The opportunity still has costs: time, the run itself, and potentially Fence reputation if you attack the wrong characters. Describe it as a lower equipment investment, not as freedom from every consequence. Your job is to return with usable items and better knowledge of the map.
On spawning, check the remaining raid time and your actual Scav extraction list. PMC and Scav exits differ on many maps. A route learned as a PMC may take you to a door your Scav cannot use. Before searching containers, choose an exit and estimate how many detours you can afford. Familiarity with a small set of exits is more valuable than a backpack full of loot that misses the final timer.
Fence reputation is also Scav karma. The research links better karma to Scav cooldown, spawn equipment, and related services. Killing an innocent player Scav carries a listed reputation loss, so avoid opening fire merely because another scavenger surprises you. Learn voices, movement, and equipment patterns while retaining uncertainty about identity. You do not need to win every encounter to turn the run into useful supplies for your next PMC attempt.
Read ammunition before judging a weapon
A weapon's appearance does not tell you whether its ammunition can penetrate the armor in front of it. The three baseline cartridge numbers are flesh damage, penetration, and armor damage. For a first comparison, 7.62x39 PS gzh is listed at 61 damage and 35 penetration in the September 8 snapshot. The 5.45x39 PS gs round instead has 56 damage and 28 penetration. Shared letters in cartridge names do not make rounds of different calibers equivalent.
The research's early upgrade paths include 5.45 PS to PP to BT and 5.56 M855 to M856A1 to M855A1. These are reference ladders, not promises that your trader currently sells each round. Check the stock, your loyalty level, and the complete cartridge name before purchasing. A cheaper gun firing suitable ammunition can be a more practical learning kit than an elaborate build firing the weakest compatible round.
Penetration is a probability influenced by the round, armor class, and remaining armor durability. It is not a guarantee that a certain number will defeat every plate in one shot. Similarly, high flesh damage is not a universal advantage against armor. Use the ammunition table to choose an intended role, then adjust your exposure and target selection to match it. Equipment helps only if you can place shots while remaining alive long enough to leave.
Treat armor and health as separate systems
Armor protects the zones it covers, and insertable plates contribute their own protection class. The research describes classes one through six and distinguishes soft armor from plates. A vest's name alone therefore cannot summarize its current protection. Inspect installed plates, coverage, and durability before buying or reusing it. A damaged or incomplete carrier should not be valued as though every protective component were present and intact.
Health is distributed across body parts rather than a single simple bar. The supplied health notes describe lethal head and thorax damage, blacked-limb penalties, and accelerated energy and hydration loss with a destroyed stomach. After a fight, check the actual injuries before deciding you can cross the map normally. Reaching a quiet room is an opportunity to assess wounds, remaining medicines, energy, hydration, and the time needed to reach extraction.
Therapist supplies medical items and post-raid healing. Know what your chosen medicine treats instead of assuming every medical object solves every condition. Read its description while safe in the stash. For a beginner route, carrying understandable basic treatment is more useful than copying a complicated stimulant setup. If an injury makes the planned objective unrealistic, change the objective to extraction. Saving the remaining kit and a useful hand-in can be better than pressing onward with reduced movement and limited recovery.
Check insurance against the mode and destination
The research lists Prapor, Therapist, and Jaeger as insurance providers, with Jaeger described as faster but more expensive. Insurance concerns recovery of eligible equipment; it is not a guarantee that everything lost will return. Base your budget on replacing the kit yourself, then treat returned gear as helpful recovery. A policy cannot turn a route you do not understand into an affordable plan if repeated losses exhaust your ammunition and medical supplies.
Mode selection matters first. Patch 1.1.0.0 removes insurance from PvP Seasonal characters, while permanent PvP Zone and PvE Zone retain it. If the feature is unavailable on a seasonal profile, that is part of the mode's rules rather than a trader unlock you missed. When following a friend into another mode, confirm the active profile and revisit any assumption about insured equipment before launching.
Destination matters as well: the research identifies The Lab, The Labyrinth, Terminal, and Icebreaker as places without insurance returns. Terminal additionally has a special character-state restoration rule, so it should be learned from its own map guide instead of being treated as an ordinary insured raid. Early learners generally get more value from understanding ordinary extraction maps first. Read the destination's special rules before paying for a service that cannot perform the function you expected there.
Turn early tasks into practical route plans
Once the relevant traders open, use tasks to give familiar routes a purpose. The research names Prapor's Debut, Therapist's First in Line and Shortage, Mechanic's Saving the Mole and Introduction, and Jaeger's Acquaintance as useful early references. These objectives are not all available simultaneously. Check the active list and requirements on your profile, then select combinations whose destinations genuinely overlap instead of copying an old universal quest order.
Introduction comes from Mechanic and opens Jaeger after retrieving the message at his Woods camp; the recorded minimum character level is two. Friend From the West is the Skier progression needed for Peacekeeper's quest line. Unlocking a trader's store and unlocking that trader's later tasks are different milestones. If a store is open but expected missions are missing, inspect the prerequisite chain and loyalty level instead of buying random items in hopes of making them appear.
Useful supplies to preserve include eligible Salewa kits, gas analyzers, building materials, dogtags, Iskra rations, noodles, and the specified beef stew. Store only quantities that match a known objective or planned upgrade. Hoarding every item makes it harder to find the ones that matter. After extraction, review each task before selling the items from your backpack; a short sorting routine can prevent a much longer replacement search.
Raise traders through level and reputation
Patch 1.1.0.0 removed the old cumulative trading-volume requirement in the supplied research. Current loyalty progression uses character level and trader reputation. Buying and reselling equipment solely to satisfy an old spending threshold is therefore outdated advice for this baseline. Ordinary purchases can still supply useful equipment, but they should serve an actual need rather than an obsolete progression counter.
Examples show why the two requirements must be checked separately. Therapist's level-two loyalty is listed at character level five and reputation 0.60; Prapor's requires level six and 0.70; Mechanic's requires level twelve and 0.60. Reaching the player level does not erase a reputation shortfall. Tasks are the meaningful route to that reputation. Inspect rewards and penalties before handing in a branching objective, because some tasks affect more than the trader receiving the item.
Daily operational tasks become available at level five, and weekly tasks at level fifteen. They can provide additional experience and reputation, but their objectives may demand maps, items, or time you do not currently have. Choose tasks compatible with your next route. A reroll can cost currency and reputation, so read the cost before replacing a mission. Treat these tasks as additions to an achievable plan, rather than allowing a random assignment to determine an expensive unfamiliar raid.
Grow the hideout without emptying the stash
The research's suggested hideout order starts with power and basic prerequisites, then practical production modules such as Workbench, Medstation, and Nutrition Unit. This is community-derived prioritization, not an official optimal build. Look at the dependency screen for the module that would solve your current problem: ammunition production, medical supply, food, storage, or another specific need. An upgrade is useful when you can actually supply and use its function afterward.
Exact current material quantities, module-level requirements, and many recipe lists are unverified as of Patch 1.1.5.0 in the supplied hideout research. Read those values in the game before collecting a large stockpile. Historical examples such as Generator level three feeding a Bitcoin Farm are useful orientation but should not be treated as a complete contemporary shopping list. Later modules also have operating costs, which matter alongside the initial construction expense.
A simple budgeting method is to preserve your next learning kits before committing spare money to construction. Reserve task items separately from optional production inputs. Crafted items qualify as FIR according to the item-status research, making eligible recipes potentially useful for hand-ins as well as supply. However, the exact recipe you need must exist at your available module level. Check that requirement first, then calculate the inputs and operating costs instead of assuming any named module can craft every related item.
Treat the flea market as access rather than a cure
The research reports basic flea-market access at PMC level fifteen, with full category access reported at level forty. It explicitly does not establish the exact intermediate category gates or the complete current restriction list. Reaching fifteen therefore expands your options without guaranteeing that any weapon, cartridge, armor, or rare item can immediately be bought or listed. Use your trader supply as a foundation and inspect market availability when the feature opens.
Purchasing an ordinary item still does not make it eligible for a task that explicitly requires found-in-raid status. This is the most useful distinction to remember before spending on a blocked hand-in. An unavailable FIR objective may need a successful loot run, an eligible craft, or a qualifying reward. It cannot be solved just by matching the name on a market listing. The precise current FIR listing rule for the market itself remains unverified in the economy research.
Do not build your beginner budget around a guide's promised profit per hour. Market prices change, available buyers change, and a route's value depends on whether you can survive it. Start by selling clear surplus and tracking what you repeatedly consume. Ammunition, medicine, and replacement equipment are real costs even when a run's backpack looks valuable. A consistent small surplus teaches a more durable routine than one fortunate rare-item discovery followed by several unaffordable attempts to repeat it.
Review a raid before choosing the next one
After returning to the stash, resolve the current raid completely. Submit eligible objectives, put needed items aside, inspect gear condition, restore health, and restock consumables before launching again. If you died, identify one concrete failure that can change next time: an unknown exit condition, an unsuitable cartridge, an exposed healing stop, or excessive time spent looting. A single actionable correction is more useful than blaming the entire map or replacing every piece of equipment.
Measure learning with repeatable milestones. Can you recognize your spawn area? Can you reach two exits without guessing? Can you name the task item you are protecting and the result needed to keep it FIR? Can you replace the kit without delaying your next session? Once those answers are comfortable, add a new map, a conditional extraction, or a more demanding quest chain. Expanding one variable at a time makes failures easier to diagnose.
For your next reading, choose the guide matching the obstacle you actually encountered. Tour explains locked progression, the FIR guide explains rejected hand-ins, ammunition comparison addresses armor performance, and individual map pages detail local exits and hazards. Keep your current objective visible and your route modest. The immediate goal is a sustainable cycle of preparation, useful action, extraction, and review; complex boss hunts and endgame access will make more sense after that cycle becomes familiar.
Avoid these mistakes
- Carrying your best kit without a route.
- Confusing seasonal and permanent progress.
- Staying to loot after completing the objective.
Source ledger
- Battlestate Games — Escape from TarkovOfficial
Official product identity and purchase entry point; current regional purchase details must be checked there.
- Patch 1.1.0.0 and KORD BREACH announcementDeveloper
Research-cited developer announcement for separate seasonal progression and the version baseline.
- Tour — Escape from Tarkov WikiReference
Ordered story unlocks and required hand-ins as recorded in the supplied September 8 research.
- Ground Zero — Escape from Tarkov WikiReference
Level pools, raid duration, landmarks, and extraction conditions.
- Found in raid — Escape from Tarkov WikiReference
Eligible origins, ordinary raid outcome conditions, and item-status exceptions.
- Trading — Escape from Tarkov WikiReference
Trader roles and versioned loyalty requirements.
- Ballistics — Escape from Tarkov WikiReference
Dated cartridge statistics and penetration concepts.
- Hideout — Escape from Tarkov WikiReference
Module roles and dependency checks; exact current recipes remain unverified in the supplied research.
- Quests — Escape from Tarkov WikiReference
Early task names, task-item handling, and operational-task access.
Frequently asked questions
Which map should a completely new player learn first?
Ground Zero is the starting reference in this baseline, with a separate pool below level 21. Learn its landmarks, active exit list, and two ordinary extraction approaches before relying on special exits.
Does a new season reset my permanent PvE character?
Seasonal progress belongs to a separate PvP character. The research describes permanent PvE and permanent PvP profiles as retained after 1.0.
Why will a trader not accept the item I bought?
Check whether the objective asks for FIR. A purchased item with the correct name may lack the required origin status.
Do I still need to spend money to increase trader loyalty?
The supplied 1.1.0.0 rework removes trading-volume gates. Meet the current character-level and reputation requirements shown by the trader.
Should my first kit have expensive attachments?
Only if its loss still leaves a comfortable replacement budget. Compatible ammunition, understandable healing supplies, and a known route are more useful initial priorities.