How to Unlock Tarkov's Endgame Maps: Labyrinth, Terminal, and Icebreaker
The three locked maps and their exact entry requirements.
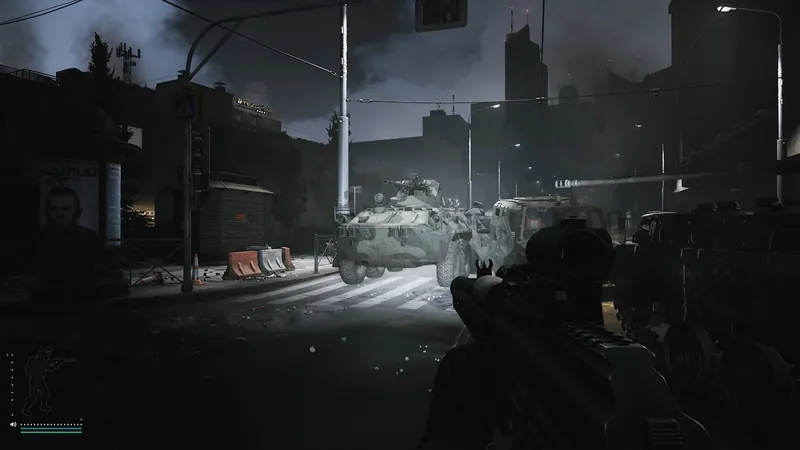
The decision first
Labyrinth entry uses Labrys and Knossos access items.
- Labyrinth entry uses Labrys and Knossos access items.
- Reach Labyrinth through the Shoreline resort basement.
- Terminal transit uses Shoreline’s port radio at night.
- Terminal resets character state after its raid.
- Boreas introduces Icebreaker’s progression.
- Stick to It unlocks direct Icebreaker selection.
The problem: three maps you cannot simply queue for
Escape from Tarkov has 13 locations in the current build, and ten of them slide into your normal rotation through the Tour story chapter. The last three do not. The Labyrinth, Terminal, and Icebreaker sit behind item gates, quest gates, and time windows, and the game never explains the full requirements in one place.
This is the guide you want when you hover over a locked map and wonder why it stays grayed out. Each of the three endgame locations demands a different kind of key: a physical keycard plus facility key for one, a night-time radio contact and an access item for another, and a story chapter plus a marine repair kit for the third. Miss any single piece and the transit point simply does nothing.
All three are what the community calls end maps. Once you cross into The Labyrinth, Terminal, or Icebreaker, the transit chain stops. There is no onward connection to any other location, so you either extract from the map itself or you do not leave at all. Plan your raid around that fact before you spend rare items getting in.
This article collects every verified entry requirement, what waits inside each map, and how the extraction side works, so you spend your keys and kits on purpose instead of learning the rules at the door. Where the community record is thin or single-source, this guide says so plainly rather than guessing.
At a glance: what each endgame map demands
Bookmark this summary. It condenses the whole guide into the minimum you need in your stash before attempting each entry.
Shoreline is the hub for all three unlocks. Two of the maps are reachable only from Shoreline, and the third gained a second route from Lighthouse only in the September 2026 patch. If you have not finished the Tour chapter far enough to move freely around Shoreline, that is your real first step.
Player counts and raid timers below come from the official Wiki map listings. Treat the item requirements as strict: transits check your inventory, and none of these entry items are consumed in advance, so a failed raid attempt at the door costs you nothing but time.
Action checklist
- Finish the Tour story chapter so Shoreline and Lighthouse movement is routine.
- For The Labyrinth, hold both the Labrys access keycard and the Knossos LLC facility key.
- For Terminal, bring the access item and arrive at the port radio between 21:00 and 6:00 in-game.
- For Icebreaker, progress the Boreas chapter and carry a Sudak-Tudak marine repair kit.
- Assume insured gear is gone forever on Labyrinth and Icebreaker; insurance does not pay out there.
- Remember there is no onward transit from any of the three maps.
| Map | Entry route | Required items | Players | Raid time |
|---|---|---|---|---|
| The Labyrinth | Shoreline resort west wing basement transit | Labrys access keycard + Knossos LLC facility key | 1-5 | 30 min |
| Terminal | Shoreline port garrison radio, 21:00-6:00 | Access item presented at the radio | 1-5 | 45 min |
| Icebreaker | Lighthouse or Shoreline dock transit | Boreas chapter progress + Sudak-Tudak marine repair kit | 1-3 | 50 min |
How these locks work and the version this reflects
Everything here was written and checked against Patch 1.1.5.0, released on September 8 during the 2026 KORD BREACH season. Tarkov's access rules and item names drift between major patches, and the Icebreaker route network already changed once this season, so re-verify the details after any large update before burning rare keys.
Mechanically, all three maps use the transit system rather than the normal map-selection screen. You load into a connected map, walk to a specific spot, meet the condition, and cross over. Your character, gear, and party carry through the transition, and the raid timer of the destination map applies from there. Treat the approach raid as part of the expedition when packing. Decide how much ammunition, healing, food, and water you want left at the transit, then avoid spending that reserve on optional fights along the way. Reaching the door with the correct key but an exhausted loadout is a poor starting point for learning another map. Agree on a cancellation rule before departure: if the approach leaves someone badly supplied, extracting from the staging map and rebuilding the kit is a reasonable result.
Two of the three maps share The Lab's harshest rule: insurance never returns anything you lose inside The Labyrinth or Icebreaker. Prapor and Therapist will happily take your money, but nothing comes back. Terminal is the exception, and it replaces insurance risk with something stranger, covered in its own section below.
The recommended-order section near the end of this guide is an editorial suggestion built from entry costs and punishment level, not an official ranking. The Wiki does not publish a difficulty field for any map, and this site treats progression order as advice, not fact.
Unlocking The Labyrinth: two items and a resort basement
The Labyrinth, also known by its in-lore alias Labrys, is a Greek-themed fortified bunker built by Knossos LLC, and it has the strictest item gate of the three maps.
Entry requires two separate items held at the same time: the Labrys access keycard and the Knossos LLC facility key. The keycard alone does nothing, and the facility key alone does nothing. Players regularly farm one and assume they are done, so check your stash for both names before you commit a raid slot to the attempt.
The only way in is a transit from Shoreline, specifically from the basement of the resort's west wing. Load into Shoreline, fight or sneak your way to the health resort, descend into the west wing basement, and use the transit point with both items on your character. Raids inside support one to five players and run on a 30-minute timer, the shortest of the three endgame maps.
Verified sources name the entry items and the route but do not pin down a single reliable farming spot for the keycard or the facility key as of Patch 1.1.5.0, so this guide deliberately does not invent spawn locations. Check the map's key rooms on Shoreline and the flea market, and treat any video claiming a guaranteed spawn with suspicion.
Inside The Labyrinth: traps, two boss encounters, and tight exits
You spawn into one of five chambers, and each chamber has a mechanism you must solve before you can move deeper. Treat the first minutes of every Labyrinth raid as a puzzle phase, not a loot phase. Rushing the door mechanism is how most first visits end. For a first visit, make opening your chamber and identifying the return route your immediate objectives. Keep track of distinctive doors, corridor turns, and landmarks as you move, using a map reference where available. In a squad, have one person describe the route while everyone confirms the same location. This is navigation advice, not a promise that a particular chamber is safe: leave yourself enough attention to inspect the next threshold before stepping through it.
The bunker is wired with traps. Tripwires, spike pits, and poisoned barbed wire all appear, and the poisoned wire is the standout threat: the poison effect ticks for 140 HP per minute, which kills an unattended operator fast. Move slowly, watch the floor and doorframes, and carry the meds to stabilize if you clip a wire.
Two bosses stalk the map. Shadow of Tagilla roams the entire bunker rather than holding a fixed room, so any corridor can become the fight. When Shadow of Tagilla dies, Vengeful Killa appears, so the second engagement is triggered by winning the first. Notable drops include the chained Labrys and the Tagilla mask marked ZABEY. If you only wanted the loot run, killing the Shadow actively raises the danger level.
The high-value keys to look for are Key 01 through Key 04, the Corpse room key, and the Observation room key. Extraction is its own puzzle, summarized below: one exit is key-locked, and the other only opens after the raid has been running for 15 minutes. Choose which exit you intend to use before chasing those rooms. If you do not have the Ariadne symbol key, build your route around the timed option and reserve time to reach it. The 15-minute restriction is elapsed raid time, so distinguish that condition from whatever remaining time you are reading on the clock. Opening another room is optional; retaining a route to extraction is essential. After a fight or detour, reassess your position and supplies before committing to the next branch.
| Extract | Always available | Condition |
|---|---|---|
| Ariadne's Path | Yes | Requires the Ariadne symbol key |
| The Way Up | Yes | Usable only after 15 minutes of raid time |
Unlocking Terminal: a night radio call from Shoreline
Terminal is the fortified southern port dock held by RUAF, the Russian military force in Tarkov's fiction, and it only opens its gate at night.
The entry window is 21:00 to 6:00 in-game time. During those hours, head to the port garrison position on Shoreline and use the radio there while carrying the required access item. Present the item through the radio contact and the transit into Terminal opens. Outside the night window the radio does nothing, so check your raid clock before you cross the map.
The Tour story chapter already trains you for this mechanic. Its seventh stage sends you to the lookout tower on Shoreline's southeast corner for a radio conversation tied to Terminal. Two rules matter there: do not kill the guards at the position, and do not mash the radio repeatedly. Players who treat it like a normal loot run break the interaction and stall their own storyline.
Terminal raids accept one to five players and run 45 minutes, noticeably longer than The Labyrinth. Because the entry depends on a clock and a live garrison rather than a keycard door, squads should agree on the plan before anyone touches the radio. Assign one person to handle the interaction and ask the others to cover the approach without initiating unnecessary combat. Confirm the current in-game time at the position; choosing a night raid earlier is not a substitute for checking the entry window when you arrive. For a first attempt, leave room in the schedule for navigation mistakes instead of aiming for the closing boundary. If the interaction fails, compare the displayed prompt with your quest objective and item name before trying again.
Inside Terminal: state reset, one random boss, and the Zubr boat
Terminal has the most unusual rule in the game: after the raid ends, whether you extracted or died, your character state is restored to what it was before entry. The only thing actually consumed is the access item you used at the radio. Read that again before you bring your best kit, because it also means you do not permanently keep what you gained. Treat Terminal as a rehearsal and story location, not a farming map. Give that rehearsal a specific learning goal: identify the route from arrival to the berth, learn where your group loses track of targets, or practice reaching the boat together. Trying to learn every route and fight every enemy in one visit makes the result harder to evaluate. Afterward, write down the location that caused trouble and one change for the next attempt. Measure progress by what you can repeat deliberately, rather than by the value of temporary loot.
Every raid spawns exactly one boss from a rotating pool of five classics: Glukhar, Killa, Reshala, Sanitar, or Tagilla. The boss holds the container ship berth area, so the docks are never safe by default. Alongside the boss you will meet Black Division operators and regular Scavs, and the map also contains friendly RUAF troops and civilians, which changes target discrimination compared to a normal raid.
Parts of the port sit inside mortar fire coverage zones, so crossing open ground without checking the map first is a real way to die to the environment. Key items worth knowing are the Armory key, the Black Division keycard, the SZ-1 explosive charge, and the Pier door key. Black Division's detailed drop table is not verified in current sources, so this site does not list one.
Extraction is a single option with scaling seats. The Zubr boat is always available but single-use, and its seat count follows your party size: three seats for one to three players, three to four seats for a party of four, and four to five seats for a full five-man group. One more quirk: anyone carrying a Secure container Alpha-1 must have it on their person to use the boat. Do not stash it and expect to board.
Unlocking Icebreaker: the Boreas chapter and the repair kit
Icebreaker is the newest of the three, added in Patch 1.0.5.0 on May 25, 2026 as the first major new map after the 1.0 release, and its lock is partly a story lock.
The map is the Boreas, a nuclear-powered icebreaker owned by the Paradigm Shipping group, sitting in the Gulf of Finland. Its companion story chapter, also called Boreas, digs into why the ship is sealed off, what happened to the crew, and who is behind it. Progressing that chapter is the first half of the unlock.
The second half is an item: the Sudak-Tudak marine repair kit. With the chapter progressed and the kit in your inventory, you can transit aboard from the dock on Shoreline or from Lighthouse. Raids run 50 minutes, the longest of the three maps, and are limited to one to three players.
There is a permanent upgrade at the end of the grind. Completing the Stick to It questline unlocks direct map selection for Icebreaker, so you no longer have to route through another map and carry the kit every time. Until that questline is done, budget one repair kit per visit.
Two final warnings. Insurance does not return items lost on the Boreas, same as The Lab and The Labyrinth. And the enemy population scales with your party size, so bringing two friends does not make the ship safer; it makes the ship fuller.
Inside Icebreaker: decks, two bosses, and a paid helicopter
The Boreas is a vertical map, and its two bosses hold different decks. The Wedge controls the third-floor gym with a retinue of three to six heavily armored guards, and the LV-119 chest rig is among his signature drops. Knight waits down on deck zero with two Rogue guards escorting him. Regular Rogues and Black Division operators fill the space between.
The keychain for this ship is long. Verified key items include the Boreas crew quarters keycard, the Boreas engine room keycard, the Compartment C-1 and Compartment C-3 keycards, the BBQ-S43 gas torch, and the SZ-1 explosive charge. The torch and charge are utility items tied to the ship's sealed compartments rather than simple door keys.
Extraction is the helicopter, and it is paid. Fire a green flare from inside the flare zone, then pay 2,400 EUR per person, and the helicopter arrives after a delay. The extract is always available and is not single-use, but the fee is per head, so a three-man squad needs 7,200 EUR on hand. Land without the cash and you have a serious problem, because there is no backup exit listed in verified sources. Before boarding the ship, have each teammate confirm their own extraction money and agree who is bringing the flare. Do not leave either check at the vague level of someone saying the squad is covered. Mark the extraction area on your planning map and work backward from it when choosing which compartments to visit. Reserve time for finding your way there, dealing with interruptions, and waiting for the helicopter; the full raid duration is not a safe allowance for looting. Decide in advance which optional room you will skip if the route takes longer than expected.
Action checklist
- Bring at least 2,400 EUR per squad member for the helicopter.
- Pack a green flare or plan to find one before extracting.
- Expect the Wedge and three to six guards around the third-floor gym.
- Expect Knight and two Rogue guards on deck zero.
- Carry the compartment keycards you actually need; the ship's rooms are spread across decks.
Is Icebreaker PvE-only? The accurate reading
Coverage of Icebreaker is split on this question, and the wording matters. Some outlets call it a PvE-only map. The more precise description, from 4Gamer's reporting, is that it is a one-to-three player PvE-oriented map that can also be entered from the PvP side, but without matchmaking against other players. You go in solo or with your own party, and every hostile you meet is AI.
This guide follows the second reading, because it matches how the map behaves in practice. The practical consequences are real either way: there is no player threat aboard the Boreas, but there is also no player loot, no player mistakes to punish, and no third-party fights to exploit. Your entire risk budget goes into AI that scales with your group size.
If you are deciding between spending your evening here or on a traditional PvP map, treat Icebreaker as the controlled-environment option: predictable opposition, a fixed entry cost, and a long 50-minute raid to work the story chapter and the key rooms.
The 1.1.5.0 change: Lighthouse joins the Icebreaker route
At launch, Icebreaker was effectively a Shoreline destination. Patch 1.1.5.0, released September 8, 2026 alongside the Lighthouse rework, added a second approach: a transit from Lighthouse to the Boreas, boarding by hovercraft from the pier at the waterside hut. The same patch moved the Rogues off the water treatment plant, removed its static weapons and mines, and put a BTR on patrol across the map, so the approach route feels different than older videos show.
The practical effect is that a Lighthouse raid can now chain directly into an Icebreaker attempt. Run the peninsula, finish your business near the coast, and cross to the ship with the repair kit in your bag. It is still a one-way trip: neither Shoreline nor Lighthouse gives you a path back once you board, because Icebreaker has no onward transits at all.
This is also your reminder that access routes are patch-sensitive content. A transit that exists today was added four months after the map itself. Recheck the route list after major updates instead of trusting any guide, this one included, past its review date.
Suggested order: which endgame map to attempt first
This ranking is an editorial suggestion based on entry cost, punishment for failure, and mechanical complexity. It is not an official rating, and the Wiki publishes no difficulty values.
First attempt: Terminal. The character state reset makes it the cheapest classroom in the game. Your only lasting cost is the access item, so a bad raid teaches you the layout, the boss pool, and the mortar zones without burning your stash. The constraint is scheduling, since you must work inside the 21:00 to 6:00 window.
Second: Icebreaker, once the Boreas chapter is underway. The AI-only opposition is predictable compared to player hunting, the 50-minute timer is generous, and finishing Stick to It permanently removes the transit hassle, which pays off across the rest of your wipe. The real cost is discipline: insurance never returns here, so only bring gear you can write off.
Last: The Labyrinth. It combines the strictest item gate, the shortest raid timer, poison traps that tick 140 HP per minute, a roaming boss whose death summons a second boss, and no insurance payouts. Go when the other two maps feel routine and when losing the kit you carry would not change your week.
Pre-flight checklist and common mistakes
Most failed endgame attempts fail at the door, not inside. The items, windows, and story flags are all checkable in your stash and quest log before you ever load a raid. Run the checklist below before every attempt until the routes are muscle memory. If a transit remains unavailable, diagnose one requirement at a time: the staging location, the exact item in your inventory, the relevant story objective, and any time restriction. Read the current prompt or quest text and note which check is unresolved. Do not assume another squad member's progress proves your own eligibility, or that a similarly named key is the required item. When the guide and the game disagree, record the precise wording and your mode and patch version before researching the discrepancy. That produces a useful question instead of an expensive series of identical failed attempts.
The most common errors this guide was written to prevent: arriving at the Terminal radio outside the night window; bringing only one of the two Labyrinth items; killing the RUAF guards or spamming the radio during the Tour contact stage; insuring an expensive kit for Labyrinth or Icebreaker and expecting a return; boarding the Boreas without 2,400 EUR per person for the helicopter; and expecting any of the three maps to offer an onward transit, which none of them have.
Action checklist
- Confirm the raid clock is between 21:00 and 6:00 before walking to the Terminal radio.
- Check that both Labyrinth items, keycard and facility key, are in your secure container.
- Verify Boreas chapter progress and pack the Sudak-Tudak marine repair kit.
- Carry the helicopter fee in euros, per person, before boarding Icebreaker.
- Bring an Ariadne symbol key if you want the Labyrinth's key-locked exit.
- Assume no insurance payout on Labyrinth and Icebreaker, and no kept gains on Terminal.
- Recheck access routes after every major patch.
Expected outcome and what to do next
After working through this guide you should be able to state, from memory, which items and conditions open each endgame map, what each map does to your gear and character state, and how you get back out. The realistic first milestone is not clearing all three; it is one clean Terminal raid inside the night window, because it costs you almost nothing to try.
From there, build depth in the systems these maps lean on. The transit network that carries you into all three endgame locations is mapped connection by connection in our transit guide at /guides/transit-system-guide, and the odd extraction styles you will meet, flares, paid vehicles, and timed departures, are cataloged in /guides/extraction-types-explained. If your Tour chapter is not finished yet, /guides/tour-quest-walkthrough is the actual prerequisite for everything above.
For the fourth locked location, The Lab uses a different keycard economy and a power-restore extraction puzzle, covered separately in /guides/the-lab-guide. Boss mechanics inside these maps reward general knowledge from /guides/boss-hunting-basics, and the broader question of which maps to run at your level is answered in /guides/map-progression-guide.
Data pages for route planning: /maps/the-labyrinth, /maps/terminal, /maps/icebreaker, plus the two staging maps /maps/shoreline and /maps/lighthouse. Boss-specific pages exist at /bosses/the-wedge and /bosses/shadow-of-tagilla, and /bosses/killa covers the original Killa before you meet his Vengeful variant underground.
Avoid these mistakes
- Assuming endgame locations are ordinary map selections.
- Expecting insurance returns on these maps.
- Ignoring special post-raid state rules.
Source ledger
- Patch 1.1.0.0 and Season 1 KORD BREACH (official forums)Developer
Verifies the 1.1.x patch line and Season 1 context used for the version stamp.
- Map of Tarkov (community Wiki)Reference
Verifies the 13-map list, entry conditions, player counts, and raid timers for Labyrinth, Terminal, and Icebreaker.
- The Labyrinth (community Wiki)Reference
Verifies the Labrys keycard plus Knossos facility key entry, Shoreline west wing basement transit, traps including the 140 HP per minute poison wire, bosses, keys, and both extracts.
- Terminal (community Wiki)Reference
Verifies the 21:00-6:00 radio window, post-raid state reset, one random classic boss per raid, Black Division presence, key items, and Zubr boat seat scaling.
- Icebreaker (community Wiki)Reference
Verifies the Boreas chapter and Sudak-Tudak repair kit requirements, Stick to It direct-selection unlock, party-size enemy scaling, The Wedge and Knight spawns, key items, and the 2,400 EUR flare helicopter extract.
- Tour (community Wiki)Reference
Verifies the Tour chapter stage involving the Shoreline southeast lookout tower radio contact tied to Terminal.
- 4Gamer: Icebreaker and Boreas reportReference
Verifies the precise framing of Icebreaker as a 1-3 player PvE-oriented map enterable from PvP without player matchmaking.
- ValoSettings: Escape from Tarkov 1.1.5.0 patch notesReference
Verifies the 1.1.5.0 release date and the new Lighthouse to Icebreaker hovercraft transit added with the Lighthouse rework.
Frequently asked questions
Can I select The Labyrinth, Terminal, or Icebreaker directly from the map screen?
Not at first. All three are reached through the transit system: The Labyrinth and Terminal only from Shoreline, and Icebreaker from Shoreline or Lighthouse. The exception comes after finishing the Stick to It questline, which unlocks direct map selection for Icebreaker.
Do I lose my insured gear on the endgame maps?
On The Labyrinth and Icebreaker, yes: insurance never returns items lost there, the same rule as The Lab. Terminal works differently. Your character state is restored after the raid whether you extract or die, so the only lasting cost is the access item, but you also do not permanently keep what you gained inside.
What time can I use the radio to enter Terminal?
Between 21:00 and 6:00 in-game time, from the port garrison position on Shoreline, while carrying the required access item. Outside that window the radio contact does not open the transit. During the Tour story stage at the southeast lookout tower, avoid killing the guards and avoid pressing the radio repeatedly.
Is Icebreaker a PvE-only map?
The most accurate description, following 4Gamer's reporting, is that it is a one-to-three player PvE-oriented map that can also be entered from PvP mode, but without matchmaking against other players. Solo or with your party, every hostile aboard is AI, and the enemy count scales with your group size.
What happens when I kill Shadow of Tagilla in The Labyrinth?
Vengeful Killa appears after Shadow of Tagilla dies, so killing the first boss triggers a second boss fight rather than ending the threat. Shadow of Tagilla roams the whole bunker, and his drops include the chained Labrys and the Tagilla mask marked ZABEY.
How much does the Icebreaker helicopter extract cost?
The helicopter costs 2,400 EUR per person and requires firing a green flare from inside the flare zone. It is always available and not single-use, but it arrives after a delay, and a full three-man squad needs 7,200 EUR total.