The Lab Guide: Keycards, Raiders, and Getting Out Alive
Endgame's most punishing map: entry cost, enemy type, and the power-on extract puzzle.
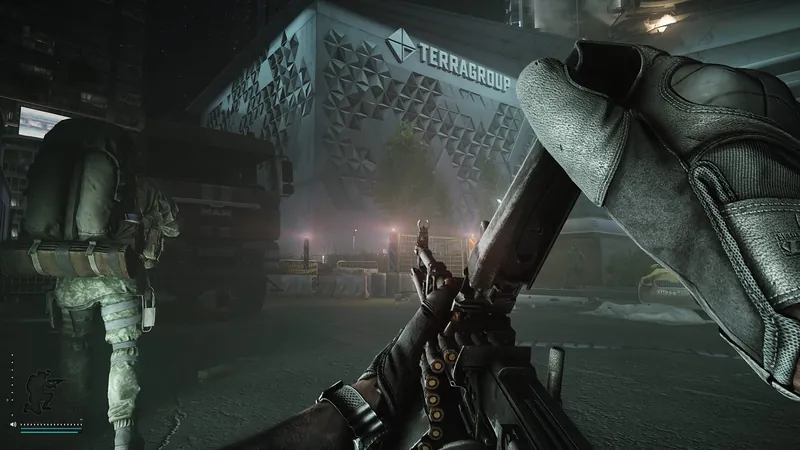
The decision first
Bring a TerraGroup Labs access keycard.
- Bring a TerraGroup Labs access keycard.
- Insurance will not recover lost equipment.
- Separate entry keycards from colored room keycards.
- Power switches control several elevator exits.
- Opening gates can alert Raiders.
- Ventilation Shaft requires leaving the backpack behind.
Start with one objective and two ways out
The Lab rewards players who can turn a good spawn into a short, controlled raid. Your first goal is to learn a route you can finish under pressure.
A successful Labs raid does not require clearing the lobby or visiting every colored room. It requires reaching an objective, keeping enough ammunition and health to leave, and knowing what your extraction needs before you arrive. The expensive mistake is letting a promising loot run become a tour of unfamiliar corridors with five minutes remaining.
For your first visits, choose one purpose: complete a task, learn a section of the map, collect medical supplies, or fight Raiders. Pick a primary exit that suits that purpose and a backup you can reach without crossing the same contested area. A small route you understand is easier to adapt than a shopping list spread across all three levels.
This guide covers the normal map, including the containment area and story-related rooms. Its location and item references were reviewed on September 17, 2026; it does not claim live testing of a particular patch. Temporary events can change access, lighting, or enemies. The route suggestions are tactical recommendations, while the source ledger identifies the references behind the map mechanics.
Getting in: the access card and the Tour unlock
The TerraGroup Labs access keycard is the white admission card. A normal entry consumes one, and each squad member needs their own. Colored room cards do not replace it. Practice and practice co-op do not consume the admission card; persistent PvE raids do. An old PvE bug that preserved the card was explicitly fixed in Battlestate's patch 0.14.9.6.
A card alone does not unlock direct selection on a fresh profile. Progress through the Tour story chapter to its Labs objectives, then enter through an eligible transit. The documented entrances are the underground access outside Klimova 16A on Streets, identifiable by the cosmonaut mural, and the sewer tunnel connected to Factory's flooded underground area.
Inside Labs, Tour directs you to the management offices at O21, the server room near the hangar, and the drainage escape route in the basement. The drainage objective is a location visit; it does not itself require activating Sewage Conduit. Follow the objective notifications and finish the relevant chapter steps to unlock direct selection. See /guides/tour-quest-walkthrough for the wider progression chain.
Source a replacement card before committing your only one to an unfamiliar route. Cards can come from loot, quest rewards, and whatever trader or crafting options your profile has unlocked. Compare those options in your current mode; trader access, availability, and market prices are poor candidates for a permanent shopping recommendation.
| Planning fact | Normal-map baseline |
|---|---|
| Raid duration | 30 minutes; use the actual in-raid clock when planning your departure. |
| Listed PMC capacity | 8–10; this is not a count of the enemies still alive. |
| Playable raid type | PMC entry; no normal player-Scav deployment. |
| Admission | One white access keycard per player per normal entry. |
| Insurance | Equipment abandoned or lost here is not returned by insurance. |
| Usual AI threat | Scav Raiders; check separately for active event changes. |
Budget the whole raid, including failed attempts
Your entry cost starts before the first shot: admission, ammunition, medical supplies, and whatever gear you lose. Labs does not provide the usual insurance recovery. Hiding a teammate's insured rifle in a dark corner accomplishes nothing here; someone must physically carry it out if you want to save it.
Build a repeatable kit you can replace several times without interrupting your ordinary questing. A comfortable rifle with suitable ammunition is a better learning tool than a weapon you are frightened to fire. If paying for another access card would empty your reserves, practice first where available or postpone repeated live attempts until your economy can support them.
Measure profit across a session. Add up what you actually sell or keep for useful progression, then subtract admissions, consumed supplies, lost gear, and the cost of key uses. One spectacular room does not prove a route is profitable, just as one empty room does not prove a card is worthless.
Set a stop condition before deploying. For example, leave after securing your task item, after filling your chosen valuable-item slots, or when you no longer have enough ammunition for another serious fight. The admission fee has already been spent. Staying longer to justify it can turn a manageable expense into a lost kit.
Learn the three levels through recognizable landmarks
Use basement, first level, and second level as your shared floor names. Community maps sometimes number floors differently, so pair every callout with a room code or landmark. 'Basement, medical elevator corridor' is useful; 'downstairs' can send a teammate to the wrong staircase.
Build your mental map around the orange dome, the parking garage, the hangar, the medical rooms, and the upper offices. Learn how to reach a staircase from each landmark, then learn where that staircase deposits you below. This lets you rotate around a fight without repeatedly opening an external map.
Read the letters and numbers on walls instead of navigating only by furniture. Similar corridors are much less confusing when you can distinguish G12 from G22. In practice, walk a short loop in both directions: recognizing a junction while approaching from the opposite side is what makes the route usable during a retreat.
Avoid assuming that a visible room is safely reachable across the open floor. Upper walkways, glass-fronted offices, and connecting corridors can expose you to several directions. Choose your next piece of substantial cover before leaving the current one.
| Area | Useful anchors | What to learn first |
|---|---|---|
| Basement | Power rooms, pipes, service corridors, elevator approaches | A route to your primary exit and a separate escape route. |
| First level | Orange dome, G11/Blue, G12/Black, weapon testing, containment wing | The nearest stairs and the exposed crossings around each objective. |
| Second level | G22/Green, O21/manager's office, R23/Red and Violet, R22/Kruglov | Door approaches, balcony sightlines, and a retreat off the floor. |
Practice navigation before adding combat
Once your profile can select the map in practice, use a session without AI to rehearse extraction. Find the power control, walk to the associated elevator, operate its controls, and watch where the extraction countdown begins. Do the same with the drainage switch and the no-backpack exit. Looking at an exit icon is different from operating it successfully.
Then repeat with AI enabled. The exercise is to return to the same exit after a fight has damaged your armor, used your ammunition, or interrupted your preferred route. You are learning how much preparation the exit requires when you cannot move directly to it.
Do not assume practice transits reproduce a normal multi-map journey. If direct practice access remains locked, study the transit arrival area and the Tour objective locations before making the live trip. Bring a concise map reference with the correct floor visible instead of trying to learn every loot marker at once.
A useful readiness check is simple: can you identify your floor, reach two different stair connections, and explain the conditions of two extracts without looking them up? You can start learning PvP before mastering every room, but those navigation skills prevent avoidable losses.
Build a loadout for close fights and a surviving retreat
Choose the gun around ammunition you can reliably obtain. Labs includes short doorway fights and longer corridor shots, so bring something you can control in both situations. A clean sight picture, manageable recoil, and familiar handling matter more than copying an expensive build whose strengths you cannot use.
For a general-purpose approach, choose ammunition appropriate for armored targets and bring several ready magazines plus reserve rounds. A deliberate flesh-damage setup can work, but it demands consistent shots at exposed limbs; it is not a substitute for an armor plan. Review /gear/ammunition and /tools/ammo-chart before spending heavily on a new caliber.
Wear serviceable armor and an audio setup you understand. Protection can give you time to recover from a mistake, but it does not make an open crossing safe. Keep enough carrying capacity to take useful loot without starting the raid so heavy that movement is already awkward.
Medical preparation should cover heavy and light bleeding, ordinary healing, fractures or damaged limbs, and temporary pain control. Bind the supplies you may need urgently. Bring food or water if your route, stimulant use, or existing condition calls for it; a long fight can turn a short raid into a resource problem.
A weapon light helps identify targets in dim rooms, while a few grenades give you options against a held doorway. Use both deliberately. Constant light reveals an approach, and an unnecessary grenade can advertise your position or force you to move through your own blast area.
Action checklist
- Check the chamber, firing mode, loaded magazines, and the actual ammunition inside them.
- Carry the admission card and only the room keys your intended route needs.
- Inspect armor condition, medical charges, and remaining keycard uses.
- Leave accessible inventory space for emergency magazine changes.
- Choose whether your backpack is essential or expendable before the raid starts.
Handle the opening minute without racing the whole lobby
At spawn, identify a landmark and the closest route into cover. Pause long enough to register nearby running, doors, and gunfire, but do not remain in an exposed spawn while studying the entire map. Your first decision is which nearby space you can control.
Expect other players to reach valuable rooms quickly. Sprinting toward Black or the upper arsenal because those were your pre-raid targets can put you behind a player who spawned closer. Treat your planned route as a preference, then adapt to the actual spawn and sound information.
Separate useful movement from avoidable noise. Cross a dangerous opening promptly when you have chosen to cross it; slow down before entering an uncleared room. Repeatedly sprinting, stopping in a doorway, and opening inventory gives an opponent both your approach and a stationary target.
If your intended corridor is already occupied, take a smaller objective on your side of the fight. You do not need to win the first engagement to make progress. Keeping a known staircase available is often more valuable than gaining a few seconds on the first loot container.
Fight Raiders from positions you can leave
Raiders are the normal map's principal AI threat. They can already be present without your intervention, and extraction switches can produce additional spawns. They move and fight in groups, so one dead Raider should prompt another check of the approach before any looting.
The recommended approach is to limit how many enemies can see you at once. Use substantial cover, take a controlled shot, and break line of sight when the enemy has acquired you. Repeatedly showing your head from the same position gives an alerted opponent a predictable target. Move to a different angle when the layout allows it.
Leave yourself room to withdraw before committing. A doorway can narrow the fight, but standing directly in it can prevent a clean retreat. Back away from the threshold and avoid choosing a small room with no answer to a grenade or a second enemy appearing behind you.
Use grenades to pressure a known position or cover a reposition, not as proof that an area is empty. A voice line or movement can provide information; silence does not establish a clear room. Keep your weapon ready for the enemy who moves somewhere other than where you expected.
After the shooting stops, reload and check your condition behind cover. Observe the bodies from another angle, then loot only when you have a defensible position. Prioritize ammunition you recognize, needed medical supplies, and compact valuables. A Raider's rifle is not automatically worth the weight or the time spent rearranging your backpack.
Read PvP pressure without inventing a player count
Sound helps you build a picture of nearby movement, but it does not give you certainty about the whole lobby. Footsteps can come from a connected floor, a quiet player can hold a room for several minutes, and the last gunshot you heard may have left both opponents alive.
Treat announcements as evidence of an activated system. They do not establish how many people remain, whether the activator extracted, or whether the nearby corridor is now unoccupied. Someone may activate an exit to spawn AI, create a distraction, or prepare a later departure.
After a conspicuous fight, assume another player could investigate. Heal where you can defend yourself, change position if possible, and avoid an extended inventory session beside the body. A won duel can still end badly if you spend its entire aftermath looking down.
In a squad, use a landmark, floor, and direction for each callout. Assign one person to watch the approach while another loots or operates a switch. Announce stair changes and crossings before making them; multiple teammates moving independently through a compact interior create confusing audio and friendly-fire opportunities.
What the six colored keycards actually open
Colored cards buy access to specific rooms. They do not guarantee valuable contents, ownership of the surrounding corridor, or a safe return to extraction. Plan around the room's position and your objective before considering its reputation.
The table gives the principal Labs uses and the kinds of loot worth checking. Treat every rare item as a possibility. A marked spawn position may be empty, and an open room may already have been searched. Inspect the use counter on your particular card instead of relying on an old video that describes unlimited access.
| Card | Door or area | Why include it in a route |
|---|---|---|
| Black | Experiment area G12 on the first level; Kruglov's office and its safe at R22 on the second | Medical and stimulant checks at G12; valuables, information items, and story access at R22. |
| Green | Laboratory block G22 on the second level | Medical supplies, possible LEDX and information items, plus a Black card spawn. |
| Blue | Quarantine room G11 on the first level | Medical supplies, possible LEDX, and a Red card spawn. |
| Red | Security arsenal R23 on the second level | Ammunition, weapon parts, weapon spawns, and access toward the separately locked arsenal storage room. |
| Violet | Security post in the R23 area on the second level | Weapon containers, parts, electronics, valuables, and possible information items. |
| Yellow | Upper parking alarm-control room | Mixed loot and a console that can suppress the Parking Gate announcement; Raiders can still spawn. |
Choose cards by the route you can survive
There is no permanent purchase order that fits every player. Someone collecting medical supplies may get useful progression from the medical side, while a player already comfortable around the upper security rooms may prefer access there. Buy access to rooms you can reach repeatedly without improvising the return trip.
Black deserves attention because its medical room and Kruglov's office support different objectives. For the office and safe, allow for separate swipes: arriving with one remaining use can leave you unable to finish what you came to do. Owning the card does not make it sensible to cross the entire map to use every lock.
Red's arsenal door locks again when closed. Keep the required access available and coordinate before shutting it with teammates inside. The inner arsenal storage also requires its own mechanical key, so the Red purchase alone does not open every lock in that area.
Compare purchase cost against remaining uses and your own results. As a hypothetical example, a card costing 1,000,000 rubles with ten usable entries allocates 100,000 rubles to each opening before admission, supplies, and deaths. Those are illustration figures, not live prices or a statement about every card's maximum uses. Record several runs before calling an expensive card a money-maker.
The blue-marking card belongs to Labs, too
The Keycard with a blue marking and TerraGroup Labs keycard (Blue) are different items, but both open rooms inside The Lab. The blue-marking card opens Sanitar's room opposite the G22 laboratory block on the second level. The regular Blue card opens G11 on the first level.
The blue-marking card is single-use and is associated with the TerraGroup Employee task. Sanitar can carry it on Shoreline, which is a source of the confusion: where the card drops is not where its lock is located. Do not buy it expecting to enter the regular Blue room or a Shoreline resort office.
For a task visit, pack the correct card and plan the upstairs approach before deployment. Make sure the objective is active and check its completion notification after collecting the required item. With a single-use key, discovering that you brought the wrong task plan can cost another admission and another card.
Mechanical keys and the containment wing
The smaller key collection can support a focused route without buying every color. Match a mechanical key to the part of the map you already visit. The manager's office offers varied loot, weapon testing supports an equipment route, and arsenal storage only makes sense when you can also enter Red.
The containment wing adds another option: residential unit no. 7. Its card can be found within the containment area, with documented checks including the security-room desk, a red chair opposite unit 7, and the floor beside the door marked 6. Further positions are inside the laboratory area opened through its electrical-room control.
The residential unit can contain valuables, information items, and weapons. Look at the shelves and the space beneath the bed rather than inspecting only obvious containers. Finding a card during the raid can make the room an efficient addition when you are already there.
Do not turn that possibility into a compulsory sweep of every spawn. An empty first check can mean the card is elsewhere or another player has beaten you to it. Set a limit on the time you will spend searching, particularly if reaching the laboratories requires another exposed crossing.
| Access item | Destination | Planning detail |
|---|---|---|
| TerraGroup Labs manager's office room key | O21, second level | Two entrances lead into the office; expect computers, storage containers, and loose valuables or information items. |
| TerraGroup Labs weapon testing area key | O11, first level | Two doors access the testing area, which has weapon containers and equipment spawns. |
| TerraGroup Labs arsenal storage room key | Inner storage within R23 | Bring Red access as well; this key does not open the outer arsenal door. |
| TerraGroup Labs residential unit keycard | Unit 7 in the first-level containment block | A local card search can fit a containment route; allow time to check the room and leave. |
Loot efficiently without relying on a jackpot
A colored card is not required to find useful loot. Office computers, containers, and loose item positions can support a run through areas you already need to cross. Use a map with the relevant loot category enabled, then learn a few checks close together instead of stopping at every marker.
Around the orange dome and working areas, inspect desks and equipment surfaces as you move between cover. In offices, check loose item positions before committing to a long sequence of searches. Small objects can be easy to miss against clutter; knowing the kind of surface to inspect makes you faster without requiring you to memorize every possible rare spawn.
Prioritize what advances your current account: a needed medical item, an upgrade component, useful ammunition, or a compact item with good sale value. A heavy weapon may look impressive while contributing less than several smaller items and making your return route more difficult.
Protect items according to their actual container restrictions and task requirements. A secure container is not a substitute for extracting with a required found-in-raid item, and not everything can be put inside one. Check the relevant objective before deciding that a rare find is already secured.
Sort in cover and keep a usable loadout. Do not replace every spare magazine slot with loot while a fight remains possible. When your bag is full, make one quick comparison, discard the least useful weight, and move; repeatedly rebuilding an inventory in a contested room adds risk without improving the route.
All seven extracts: controls, destinations, and restrictions
Read the switch location and the departure location as separate instructions. Restoring elevator power is preparation, not extraction. After using a control, verify what changed and continue to the actual exit.
The table covers the seven standard PMC extractions. Hangar and Parking are conditional, so confirm availability during your raid. Cargo is single-use; treat it as a primary option only while it remains usable. A listed or powered exit can still have an occupied approach.
| Extract | Activate here | Depart here | Key restriction |
|---|---|---|---|
| Cargo Elevator | Basement G1 power control | Second level, opposite G21 | Power, call, then use the elevator; single-use departure. |
| Main Elevator | Basement power room opposite R4 | Basement corridor between R6 and R8 | Power and elevator controls required. |
| Medical Block Elevator | Basement G6 power control | Basement between G3 and G4 | Power and elevator controls required. |
| Hangar Gate | Control cabin B24 above the hangar | B11 gate passage | Conditional availability; open the gate first. |
| Parking Gate | Second-level control in Y21 beside R22 | Y11 parking exit | Conditional availability; open the gate first. |
| Sewage Conduit | Drain switch on the left in basement B1 | Right-hand side of the drainage room | Allow about 80 seconds for water drainage, then complete extraction. |
| Ventilation Shaft | No activation switch | Basement corridor by G7, between G1 and G8 | No backpack equipped. |
Use elevators as a complete sequence
The elevator sequence is power, call, enter, and operate the departure control. Do not stop after the first interaction and assume standing near the doors will finish the raid. Check for the extraction countdown, remain inside its area, and keep watching until the raid ends.
Main and Medical are useful exits to learn together because their departures are in the basement. Practice reaching each power control and then the lift without returning upstairs. Choose between them based on where you already are and which corridor you can approach with the most information.
Cargo needs a different plan: its power is below, but its departure is on the second level. That extra vertical trip can be convenient for an upstairs objective and awkward for a wounded player already in the basement. Consider the whole journey before choosing it from the map.
Power activation can bring attention and additional AI. Before touching a control, reload, identify cover, and decide where you will move if the approach becomes occupied. A corridor you crossed earlier is not permanently cleared; another player or roaming enemy can enter it while you operate the switch.
For a squad, assemble before committing to departure, especially at Cargo. Say which elevator you mean rather than simply calling 'lift.' If the intended exit is unavailable, switch to the backup while you still have enough time for its own controls and approach.
Hangar and Parking: plan the return from the control
The gate extracts ask you to operate a control above the departure area and then reach the open gate. That makes the return journey the part to rehearse. Look at the floor below and the route down before you interact; opening an exit does not grant safe passage across the space in front of it.
Hangar uses the control cabin at B24. Parking uses the Y21 control near R22. If the relevant gate cannot be opened for this raid, move on to a prepared alternative. Repeated button presses and a last-minute search for a missing condition waste the time you need for an elevator or drainage route.
Yellow provides access to the alarm-control console that can disable the Parking announcement. Use it before activating Parking if you intend to take advantage of that feature. This suppresses the broadcast, not Raider spawns, and it does not erase footsteps, combat noise, or what a player can see.
At either gate, resist sprinting straight through as soon as the door moves. Check the passage and nearby firing positions, then cross with a plan for cover. If a fight blocks your departure, retreat toward a known junction rather than committing deeper into the opening simply because extraction is close.
Sewage and Ventilation: quieter exits with different costs
Neither Sewage Conduit nor Ventilation Shaft has an activation announcement. They are useful alternatives when you want to avoid a broadcast, but the absence of that announcement does not make their corridors safe or make your movement inaudible.
At Sewage, use the drainage control in B1, then allow roughly 80 seconds for the water to lower. The waiting period is setup time, so leave additional time to reach the extraction position and finish its countdown. Starting the pump with barely that much time left is an unnecessary gamble.
You can defend a suitable nearby position while the water drains rather than standing exposed over the channel. Keep track of the approach and the timer. If you rotate away during the wait, remember that another enemy can arrive before you return; the drain process does not reserve the room for you.
Ventilation requires you to remove your backpack. If using it as a fallback, transfer the items you intend to keep into available, permitted storage before approaching the exit. Do the sorting behind cover, then abandon the pack and verify extraction begins.
The backpack restriction is an economic decision as well as a mechanical one. A task item and surviving kit may be worth more than the bag's contents. Decide what you would sacrifice before you are badly wounded and trying to negotiate with yourself beside the vent.
A first survival route without colored cards
Use a short loop on the side of the map where you arrive: identify a landmark, search a few accessible positions nearby, and return through a known staircase toward a basement exit. Main or Medical makes a sensible primary destination once you have rehearsed its controls. Keep Sewage or a no-backpack departure as a conditional backup.
The point of this route is to practice the same transitions under live pressure. Avoid crossing the central working area just because a distant room might still be unlooted. If a fight occupies your staircase, use the second connection you learned in practice and reduce the amount of looting.
For the first successful attempt, finish early enough that an unexpected fight does not create a timer crisis. An illustrative target is to be moving toward your exit with about ten minutes remaining, sooner if you are hurt or far from its power control. This is a planning buffer, not a rule about when the map becomes safe.
Afterward, review one navigation error and one decision that worked. Add another nearby room on a later attempt. Expanding a route by one useful connection is easier to retain than replacing it every raid with a completely different tour.
Two specialist routes once you know the exits
For medical supplies, use a route built around the G11/G12 side and the nearby stairs. Visit whichever of Blue or Black you actually own, then assess the upstairs approach before adding Green at G22. The blue-marking room is a separate, task-driven stop. End the route when you have the required supplies rather than treating every medical door as mandatory.
Pair the medical route with a practiced descent to Medical Block Elevator, while keeping another basement option in mind. A contested staircase is a reason to shorten or redirect the run. Do not repeatedly approach the same upper doorway merely because you paid for the card.
For the upper offices and arsenal, group the R23 rooms you can open, or choose a specific office objective. Red and Violet share a useful area, but every additional search increases the time you spend near predictable doorways. If your purpose is Kruglov's safe, reserve the necessary Black uses and make that the priority.
From upstairs, compare the nearest known descent toward Main with Cargo's longer activation-and-return sequence. Choose the exit whose complete route you can control. If you reach the containment wing instead, treat unit 7 as its own branch rather than adding it automatically to an already long office run.
These are adaptable route frameworks, not spawn-independent speedruns. Start from your actual position, reverse or shorten the route when contact dictates, and preserve enough resources for departure. A successful specialist run can consist of one useful room and a clean extraction.
Let the task determine what counts as success
Check your active objective before combining quests with loot farming. A location visit, a special quest item, a found-in-raid handover, and a Survived extraction have different completion conditions. Reaching the right room is not enough when the objective also requires bringing something back.
For TerraGroup Employee, the target is information from Sanitar's workplace, including the Flash drive marked with blue tape. Bring the blue-marking card and plan your exit before opening the room. The regular Blue card will not substitute for that access.
For The Ticket's laboratory master-pass objective, the documented route uses Kruglov's office and its safe, requiring two Black swipes. Read the active story step before spending the uses. For The Guide, a Run Through does not count as the required Survived result, even though you physically left the map; use /guides/found-in-raid-explained to review survival-related item status.
Persistent PvE still deserves a complete extraction plan. AI can interrupt a switch route, and an unsuccessful raid can still cost the equipment you carried. Adjust tactics to the enemies actually present rather than importing assumptions about human rush timings.
For an event, check its current objectives and rules before buying specialized gear. Normal-map advice cannot guarantee an unchanged enemy roster or lighting setup during a temporary scenario. An event video should not become the basis for a permanent claim that every Labs raid works that way.
A transit to Streets is another raid, not a stash exit
The Lab also has a transit to Streets of Tarkov near the orange dome and the office with the billiard table. It is separate from the seven standard extractions. Following that connection continues your journey onto another map; it is not the same outcome as returning safely to the stash.
Use the transit when it serves a planned multi-map objective and you have the resources for the next location. Before committing, consider your ammunition, medical supplies, weight, and knowledge of the destination's extracts. A full bag does not become safer merely because you leave the current map.
For an ordinary loot run, a standard Labs extraction is usually the simpler finish. Do not make Streets your emergency option unless you understand what the transit will do and are prepared to survive there. More connections can create flexibility, but each extra raid also adds another opportunity to lose what you are carrying.
Leave before the raid starts making decisions for you
Reassess after each substantial fight or valuable find. Check ammunition, healing, armor condition, carrying weight, and the time needed to reach the backup extract. If two of those have deteriorated, reduce the remaining plan instead of adding one more room.
Build your departure budget from actual travel and setup. A nearby powered elevator and an unactivated drain across the basement are not equivalent choices. Add room for one interrupted corridor, one necessary heal, and a change of exit. That buffer is especially useful while the map is still unfamiliar.
When the primary route is contested, compare the cost of fighting with the cost of leaving elsewhere. Giving up a backpack can be reasonable when it saves task progress and a usable kit. Walking away from a body can be reasonable when its gear would make you slower and consume your last minutes.
After extraction, unload quest items and replenish the supplies you used before queuing again. Keep a brief note of the route, entry cost, and reason you left. Over several runs, that record will tell you which rooms improve your results and which tempting detours repeatedly turn a successful raid into a loss.
Your pre-raid checklist and next practice session
Use the checklist to turn the guide into a repeatable routine. If you cannot answer one of the extraction questions, resolve it before spending another admission card. The most useful improvement for the next run is usually one better connection between your objective and a way out.
Keep /maps/the-lab open for a compact location reference. Use /guides/budget-loadouts for equipment planning, /guides/health-and-healing-explained for recovery supplies, and /guides/high-value-loot-and-keys when deciding which access purchases fit your broader progression. Return to practice whenever a new route introduces a switch or staircase you have not used.
Action checklist
- Name the raid's primary objective and the condition that will make you leave.
- Confirm entry access, task prerequisites, and the correct cards with enough remaining uses.
- Pack a replacement-friendly loadout with ammunition and medical supplies for the return journey.
- Identify the floor and landmarks around the objective, plus two stair connections.
- Choose a primary extraction and a backup with different approach risks.
- Account for elevator controls, gate availability, drainage time, or the backpack restriction.
- Keep enough time and resources to change the route after an unexpected fight.
Avoid these mistakes
- Expecting ordinary Scav behavior from Raiders.
- Arriving without an extraction plan.
- Confusing Sanitar’s blue marking card with the blue room card.
Source ledger
- Battlestate Games: patch 0.14.9.6 announcementDeveloper
Historical developer confirmation that access-card preservation in PvE was a bug and was fixed; not used to claim a current patch version.
- Escape from Tarkov Wiki: The LabReference
Community reference for normal raid duration and capacity, insurance, announcement exceptions, extract controls and locations, and the Streets transit.
- The Tarkov Handbook: The Lab map and extractsReference
Cross-check of the seven extraction requirements, Cargo's single-use status, Sewage drainage, and the no-announcement exits.
- Escape from Tarkov Wiki: The LabReference
Additional map reference for the elevator sequence: restore power, call the elevator, then operate the internal departure panel.
- Tarkov.help: The Lab interactive mapReference
Spatial and loot-category reference for accessible containers, loose loot checks, and the distinction between ordinary extracts and transit.
- Escape from Tarkov Wiki: TourReference
Factory and Streets entrance locations, Labs exploration objectives, drainage-visit condition, and direct-selection unlock.
- Escape from Tarkov Wiki: TerraGroup Labs access keycardReference
Single-use admission, individual group-member requirement, practice exceptions, and documented sources of replacement cards.
- Escape from Tarkov Wiki: Scav RaidersReference
Normal Labs Raider presence, group behavior, and the chance of additional Raiders following extraction-switch activation.
- Escape from Tarkov Wiki: Black keycardReference
G12 experiment room, Kruglov's R22 office and safe, and the distinct loot categories behind those locks.
- Escape from Tarkov Wiki: Green keycardReference
G22 location and medical, information-item, and Black-keycard loot possibilities.
- Escape from Tarkov Wiki: Blue keycardReference
G11 quarantine-room location, medical loot, and possible LEDX and Red-keycard spawns.
- Escape from Tarkov Wiki: Red keycardReference
R23 arsenal access, the door relocking on closure, equipment loot, and the additional inner storage lock.
- Escape from Tarkov Wiki: Violet keycardReference
R23 security-post location and weapon, electronics, valuables, and information-item loot categories.
- Escape from Tarkov Wiki: Yellow keycardReference
Alarm-control room access and suppression of the Parking broadcast without preventing Raider spawns.
- Escape from Tarkov Wiki: Keycard with a blue markingReference
Single-use Sanitar-room access inside Labs opposite G22, the Sanitar drop source, and distinction from the regular Blue card.
- Escape from Tarkov Wiki: Manager's office room keyReference
O21 office location, two entrances, and computer, container, and loose-loot possibilities.
- Escape from Tarkov Wiki: Weapon testing area keyReference
O11 weapon-testing area, its two doors, and weapon-container and equipment loot.
- Escape from Tarkov Wiki: Arsenal storage room keyReference
Separate inner storage access in R23 and the requirement to reach it through the Red-keycard arsenal.
- Escape from Tarkov Wiki: Residential unit keycardReference
Containment unit 7, documented local card positions, laboratory power access, and residential-room loot checks.
- Escape from Tarkov Wiki: TerraGroup EmployeeReference
Sanitar's workplace and the Flash drive marked with blue tape as the task's Labs objectives.
- Escape from Tarkov Wiki: The TicketReference
Master-pass objective in Kruglov's safe and the need for two Black swipes to reach it.
- Escape from Tarkov Wiki: The GuideReference
The required Survived extraction status and why a Run Through does not complete the Labs objective.
Frequently asked questions
Is the white Labs access keycard consumed every raid?
Yes, normal entry consumes a white access card, including in persistent PvE. Every group member needs their own. Practice and practice co-op are exceptions. The admission card is separate from the colored cards used at room doors.
Why is The Lab still locked when I own an access card?
Direct map selection is tied to the Tour story chapter. Follow its Labs stage, enter through the appropriate Factory or Streets transit, and complete the listed exploration objectives. Owning the admission card does not by itself complete that unlock.
Can I recover insured gear or deploy as a Scav?
The normal map has no player-Scav deployment, and insurance does not return equipment left in Labs. A surviving teammate can carry gear out for you, but hiding it for an insurance recovery will not save it.
Do all Labs extracts make an announcement?
No. Sewage Conduit and Ventilation Shaft have no activation announcement. Yellow-room controls can suppress the Parking Gate broadcast, but that does not prevent Raider spawns or make the approach safe.
What is the easiest extract to learn first?
Main or Medical is a useful starting point if you want to keep a backpack: practice the power control, route to the lift, call button, and departure interaction. Ventilation is simpler mechanically when you can leave without a backpack. Choose the approach you know best.
Why is a powered elevator not extracting me?
Power is only the first step. Go to the correct elevator, call it, enter, and use its departure control. Confirm the extraction countdown. Cargo departs from the second level and is single-use, unlike the basement departure locations of Main and Medical.
Is the blue-marking card used on Shoreline?
Its lock is in The Lab: Sanitar's room opposite G22 on the second level. Sanitar can drop the card on Shoreline. It is single-use and distinct from the regular Blue card, which opens the first-level G11 quarantine room.
Do I need colored keycards to make a Labs run worthwhile?
No. Accessible loot and task progress can justify a focused run without them, although no route guarantees profit. Buy room access when you know the surrounding area, can afford repeat admissions, and have a clear reason to visit the room.
How many Black uses do I need for Kruglov's office and safe?
Plan for two swipes: one for the office and one for its safe. Check the card before deploying, especially for The Ticket's master-pass objective. A card with only one remaining use does not cover both locks.
Are Raiders guaranteed after I press an extraction switch?
No. Additional Raiders are a possible result, not a guaranteed reward for every activation. They can also be present before you press anything. Prepare for contact without assuming a silent switch proves the area is empty.
Does the Streets transit extract my loot to the stash?
No. It continues the journey to Streets of Tarkov. Use it for a planned transit objective with enough supplies to survive the next map; use a standard Labs extraction when your goal is to finish the run.